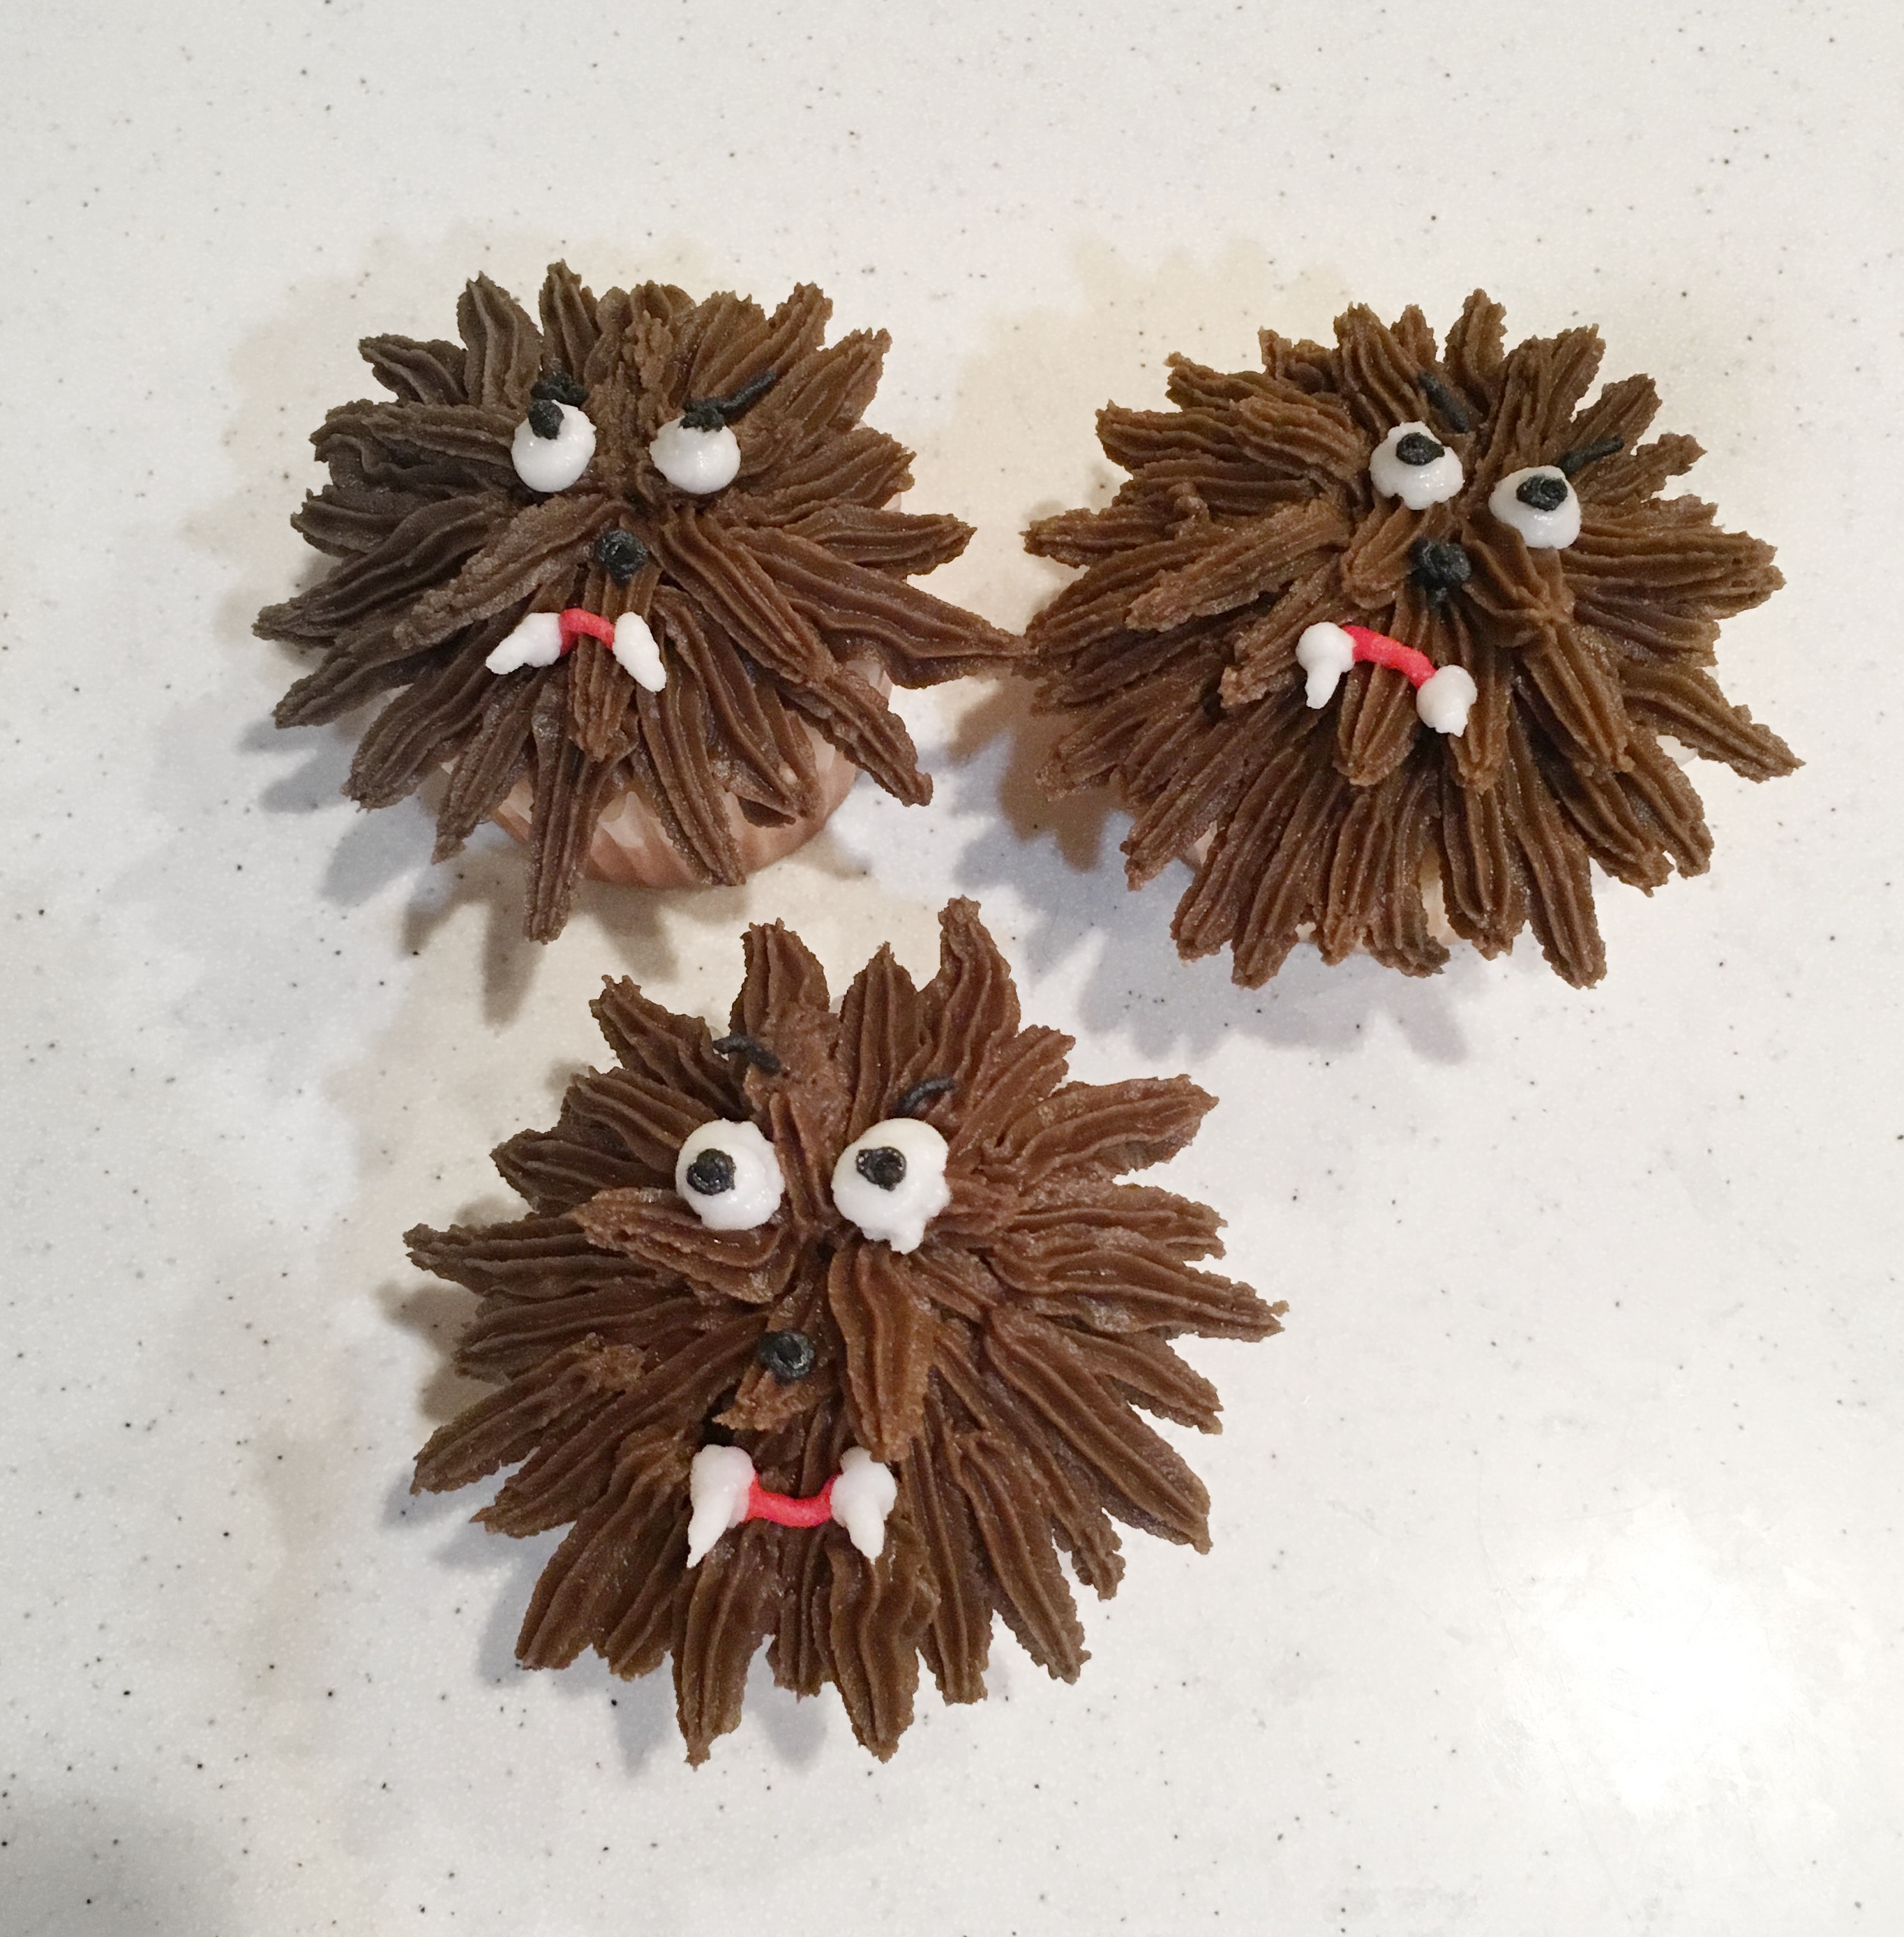
Werewolf Cupcakes
How cute are these Werewolf cupcakes? They are the prefect spooky touch for your Halloween party. When the kids find out that they require extra frosting, they will come back for more!

When creating these cupcakes, I tried to use as little black and red icing as possible as these two color require so much tint that the flavor of the frosting can be effected.
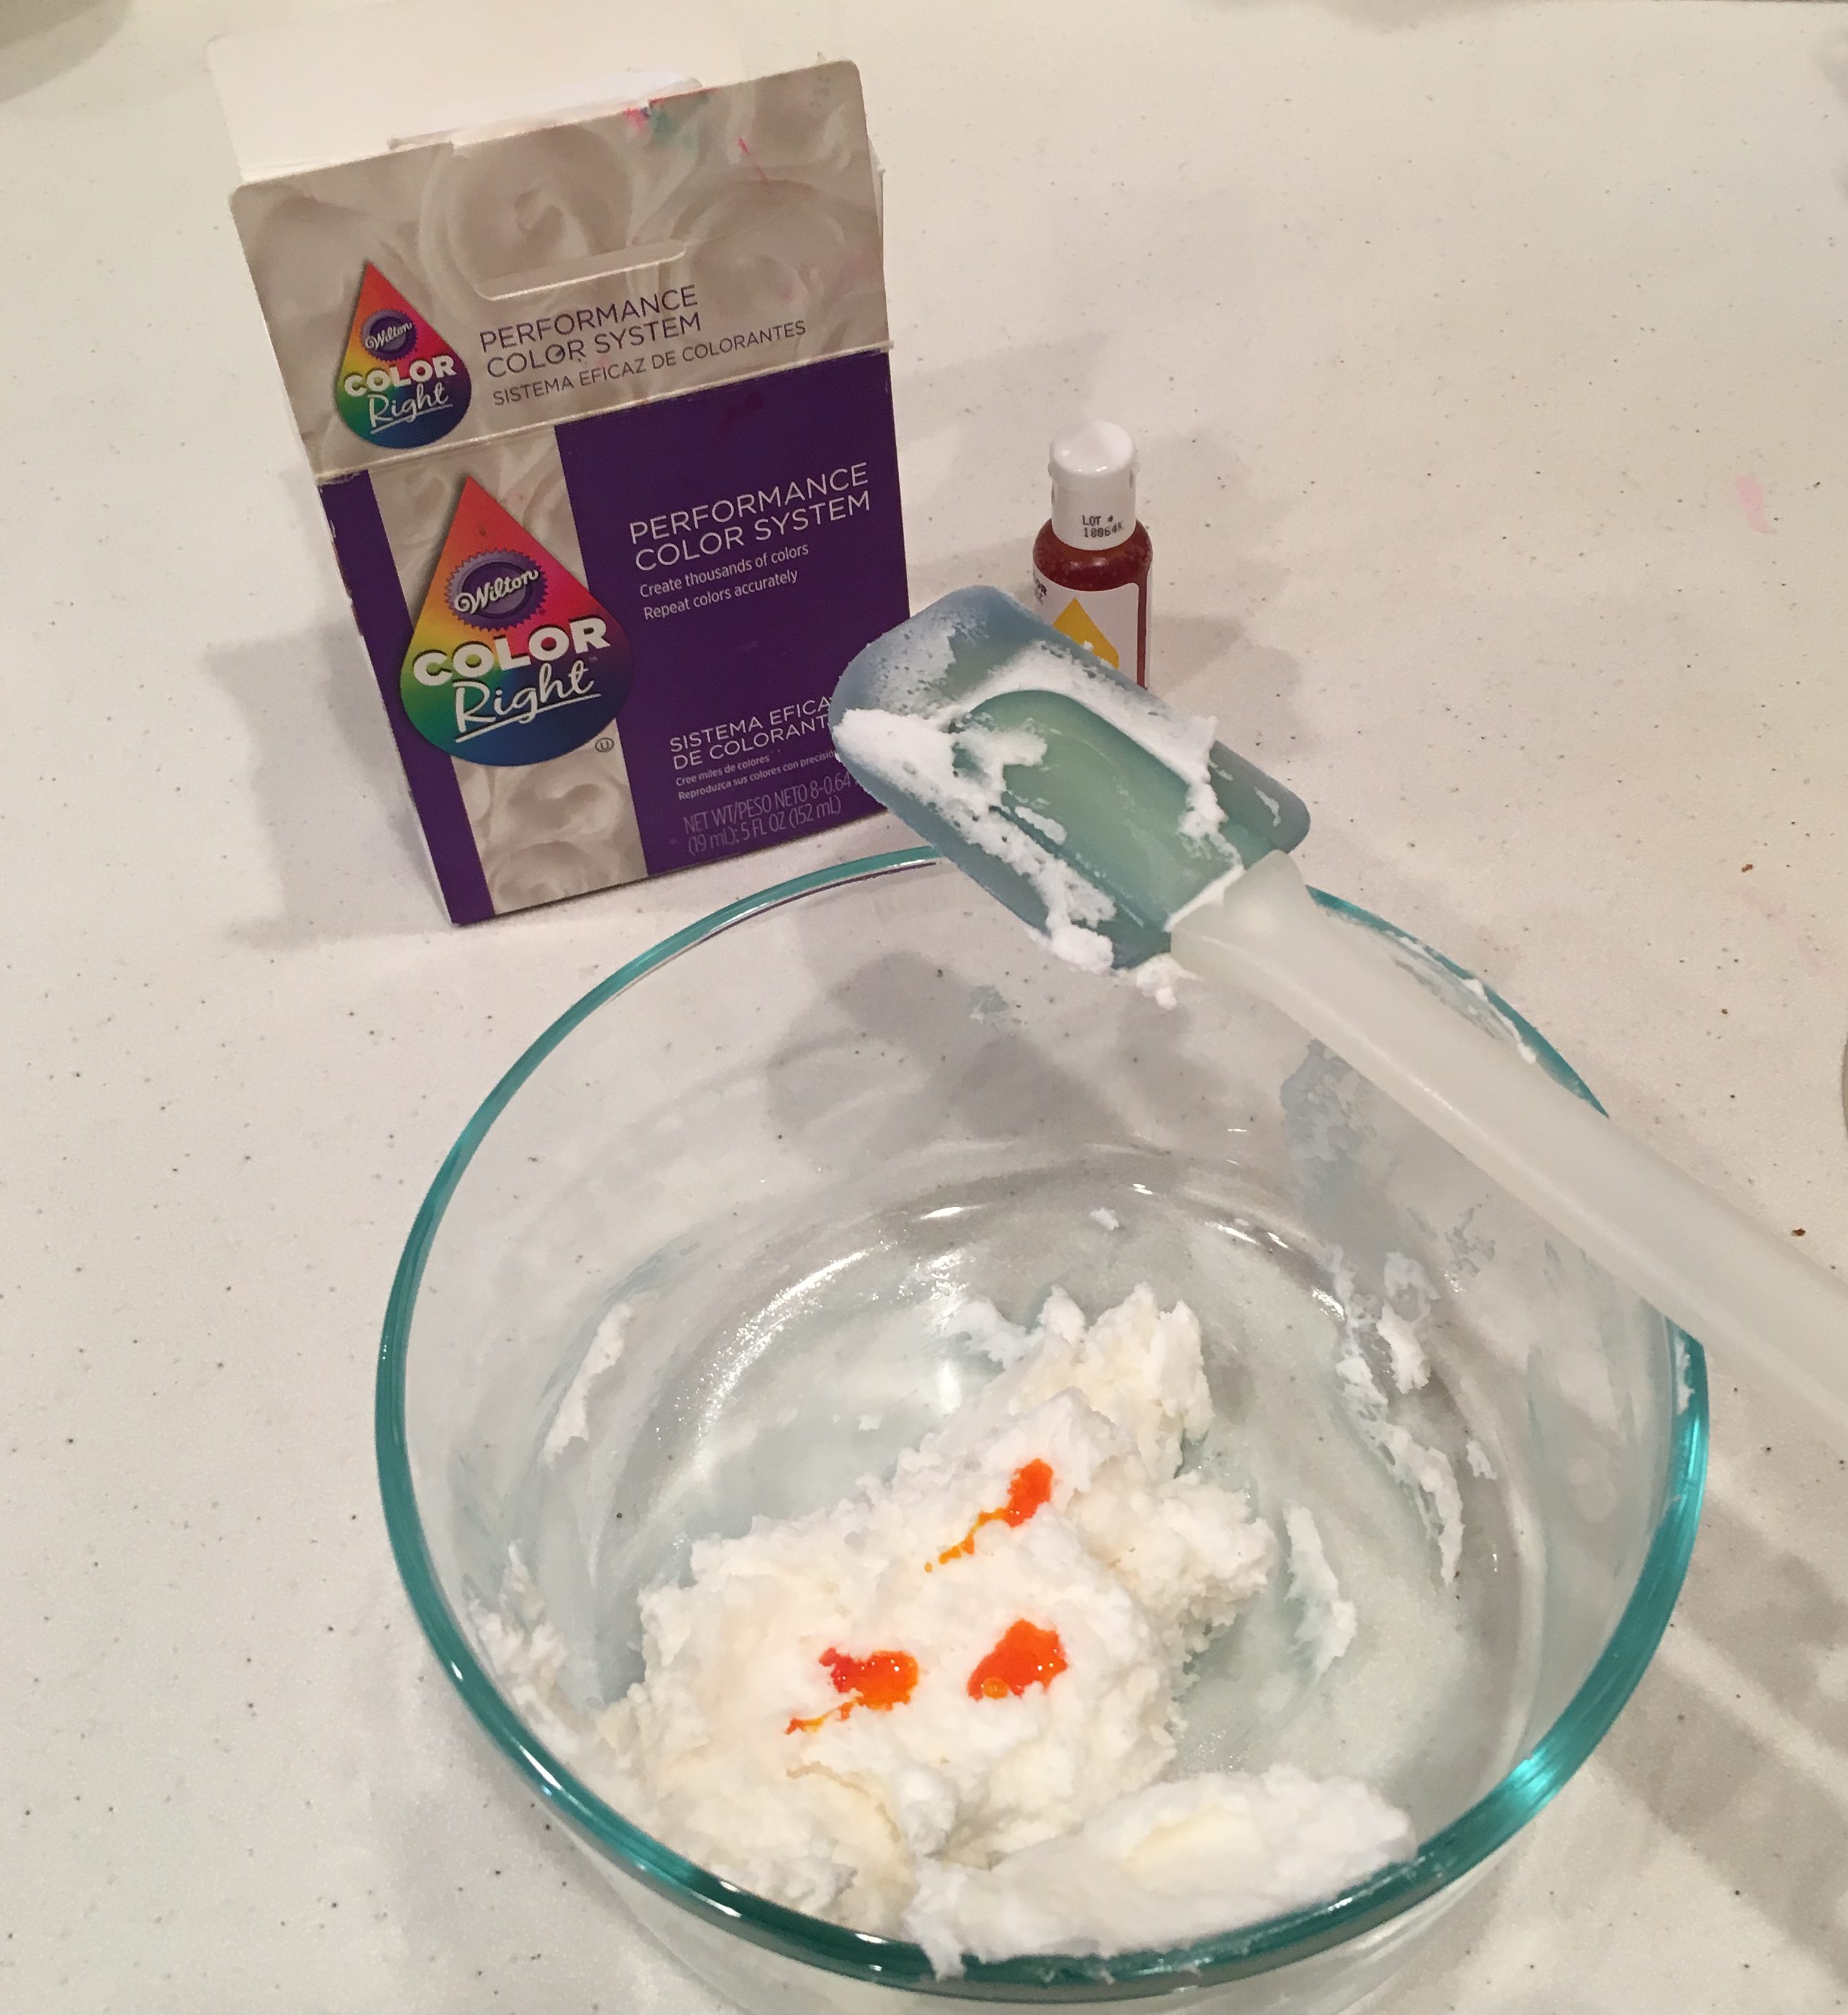
Buttercream is the perfect frosting for these cupcakes are it is delicious and easy to work with. You can find two different buttercream recipes here. I have recently begun using Wilton Color Right Performance Food Coloring Set

When decorating I sometimes use parchment triangles to make frosting bags but have recently had issues with the bags tearing so I now prefer the disposable bags above over parchment triangle bags.
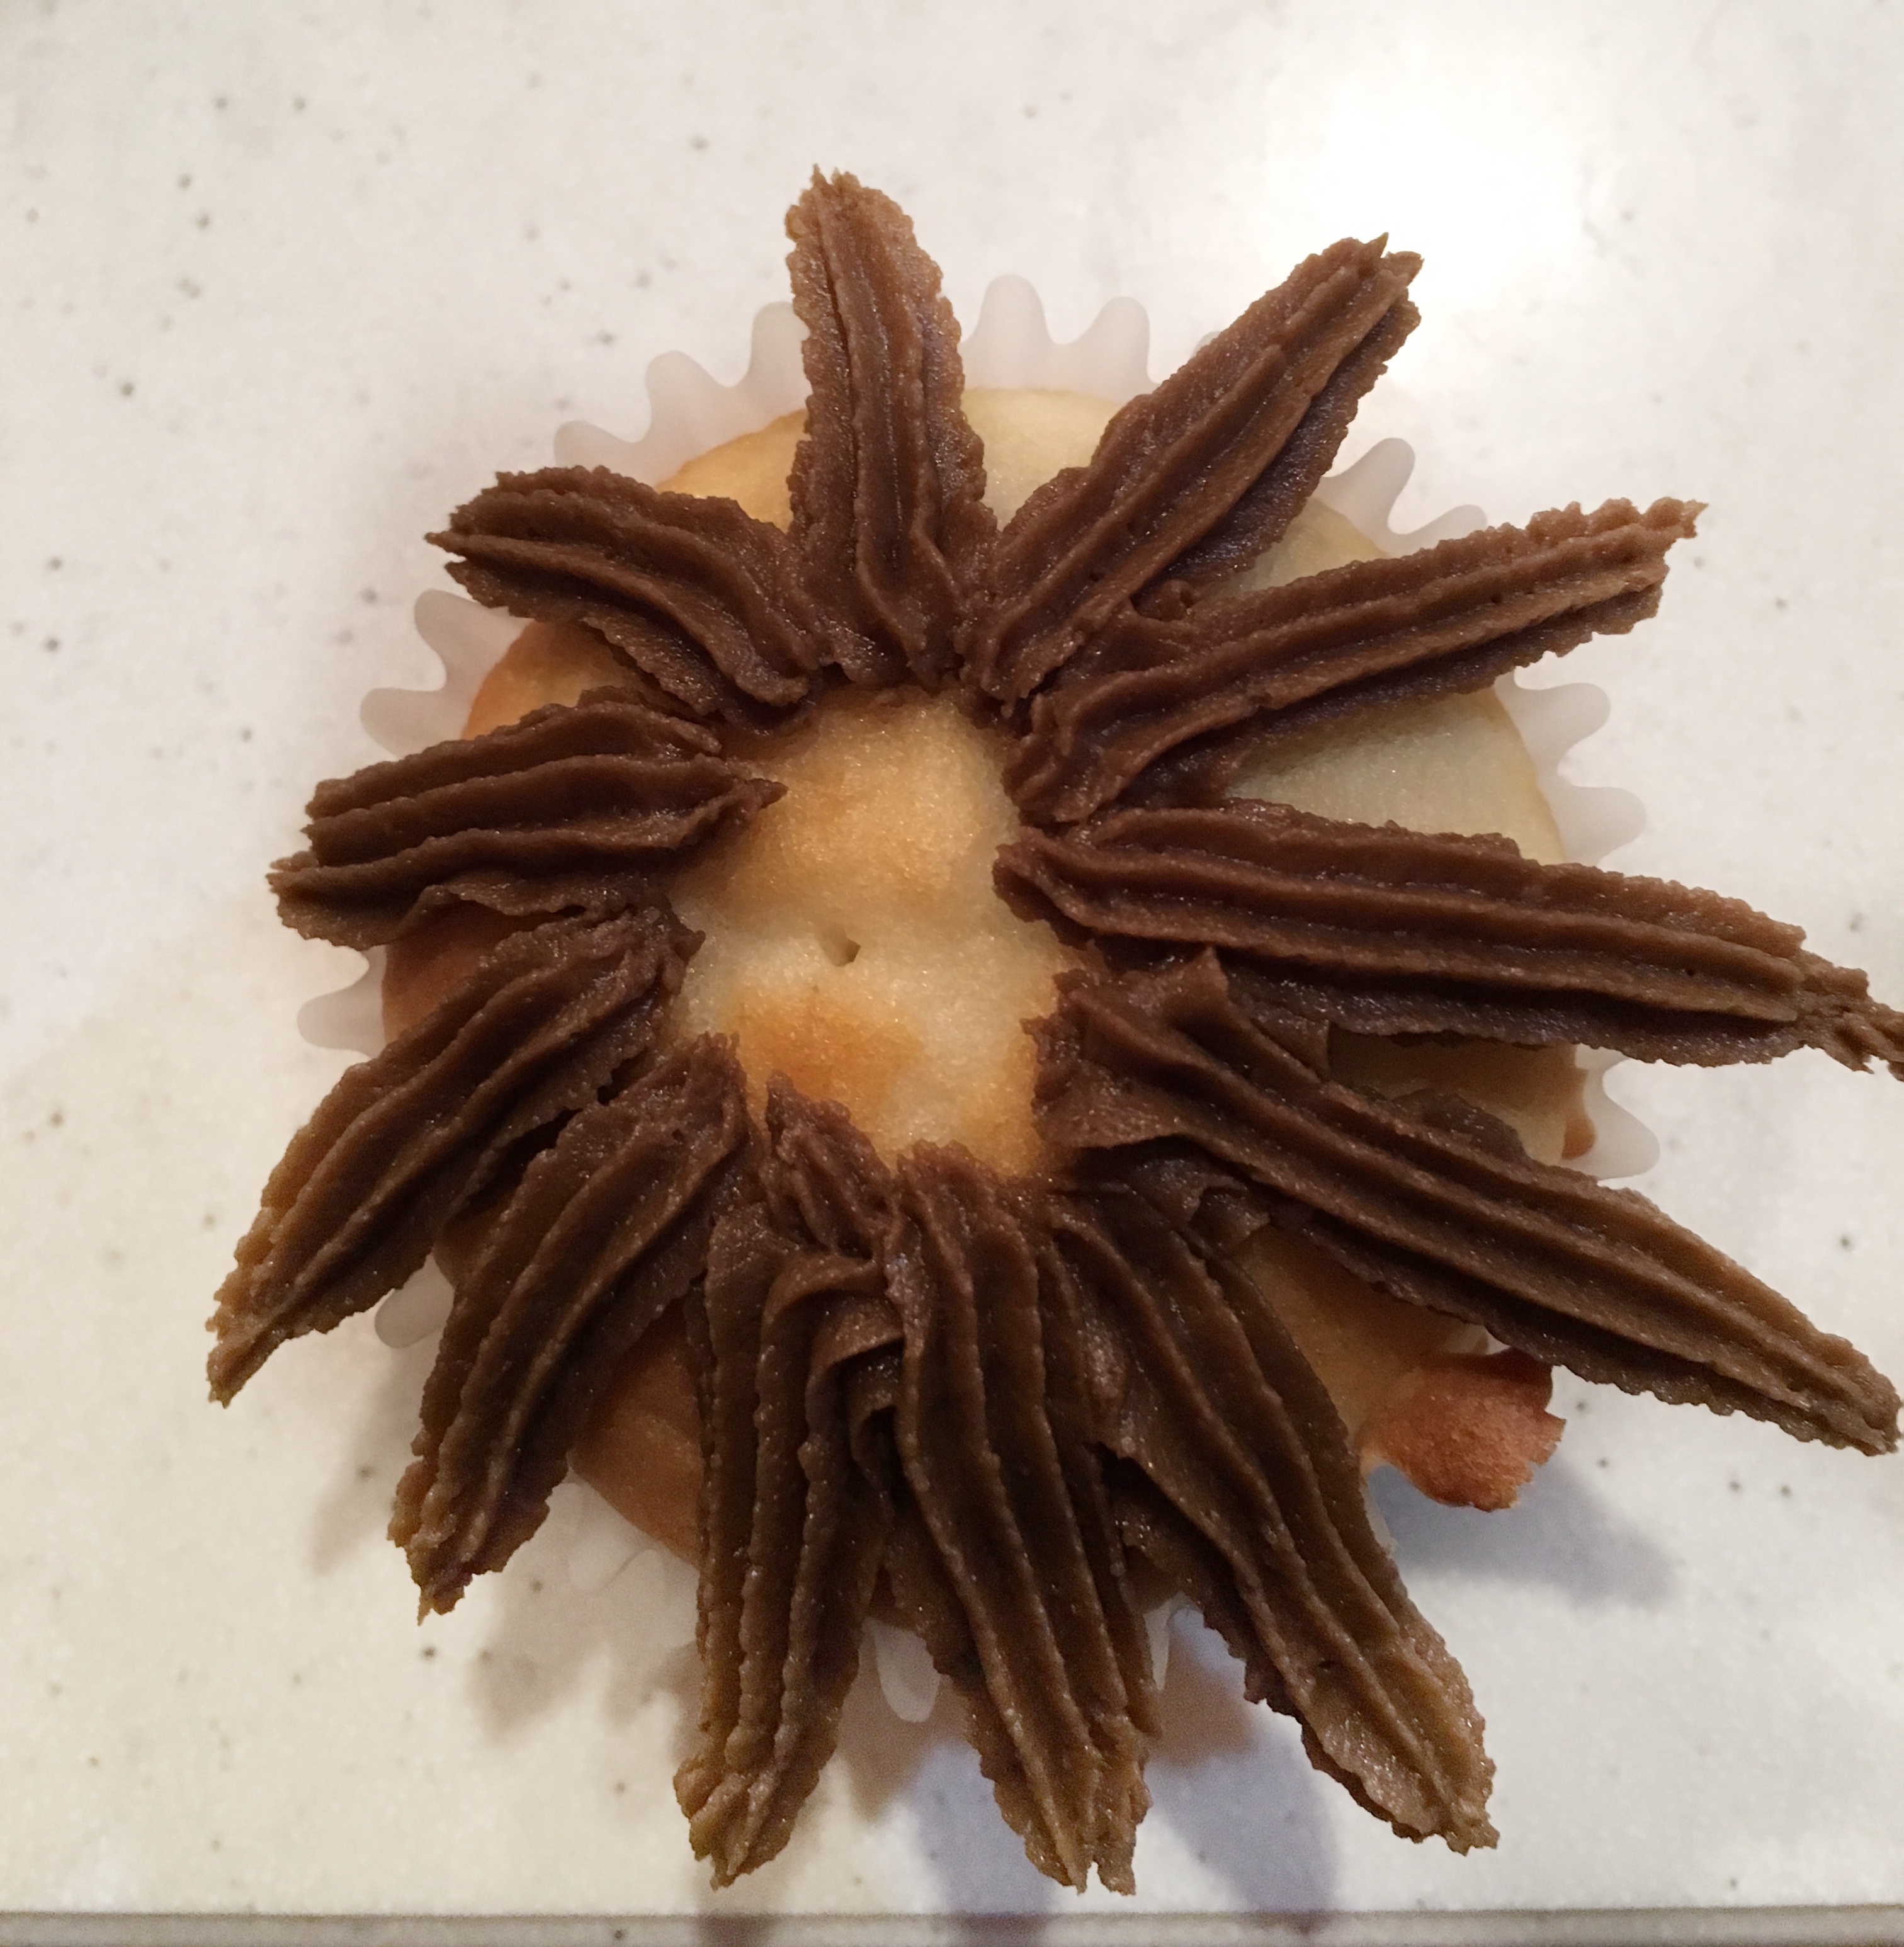
Step 1 of the werewolf cupcakes is the crucial step for the outcome of the cupcake. For this step you will need tip #18 which can be found here. This step will be the base for the werewolf. You want to place a series of frosting strips originating from an off-center circle on the cupcake. The circle needs to be off-centered so that the werewolf will not just look like a fuzzy ball.
In step 2 you will continue to use tip #18 and continue to add frosting strips around the off-center circle. These strips will begin to fill in the depth and the thickness of the werewolf.
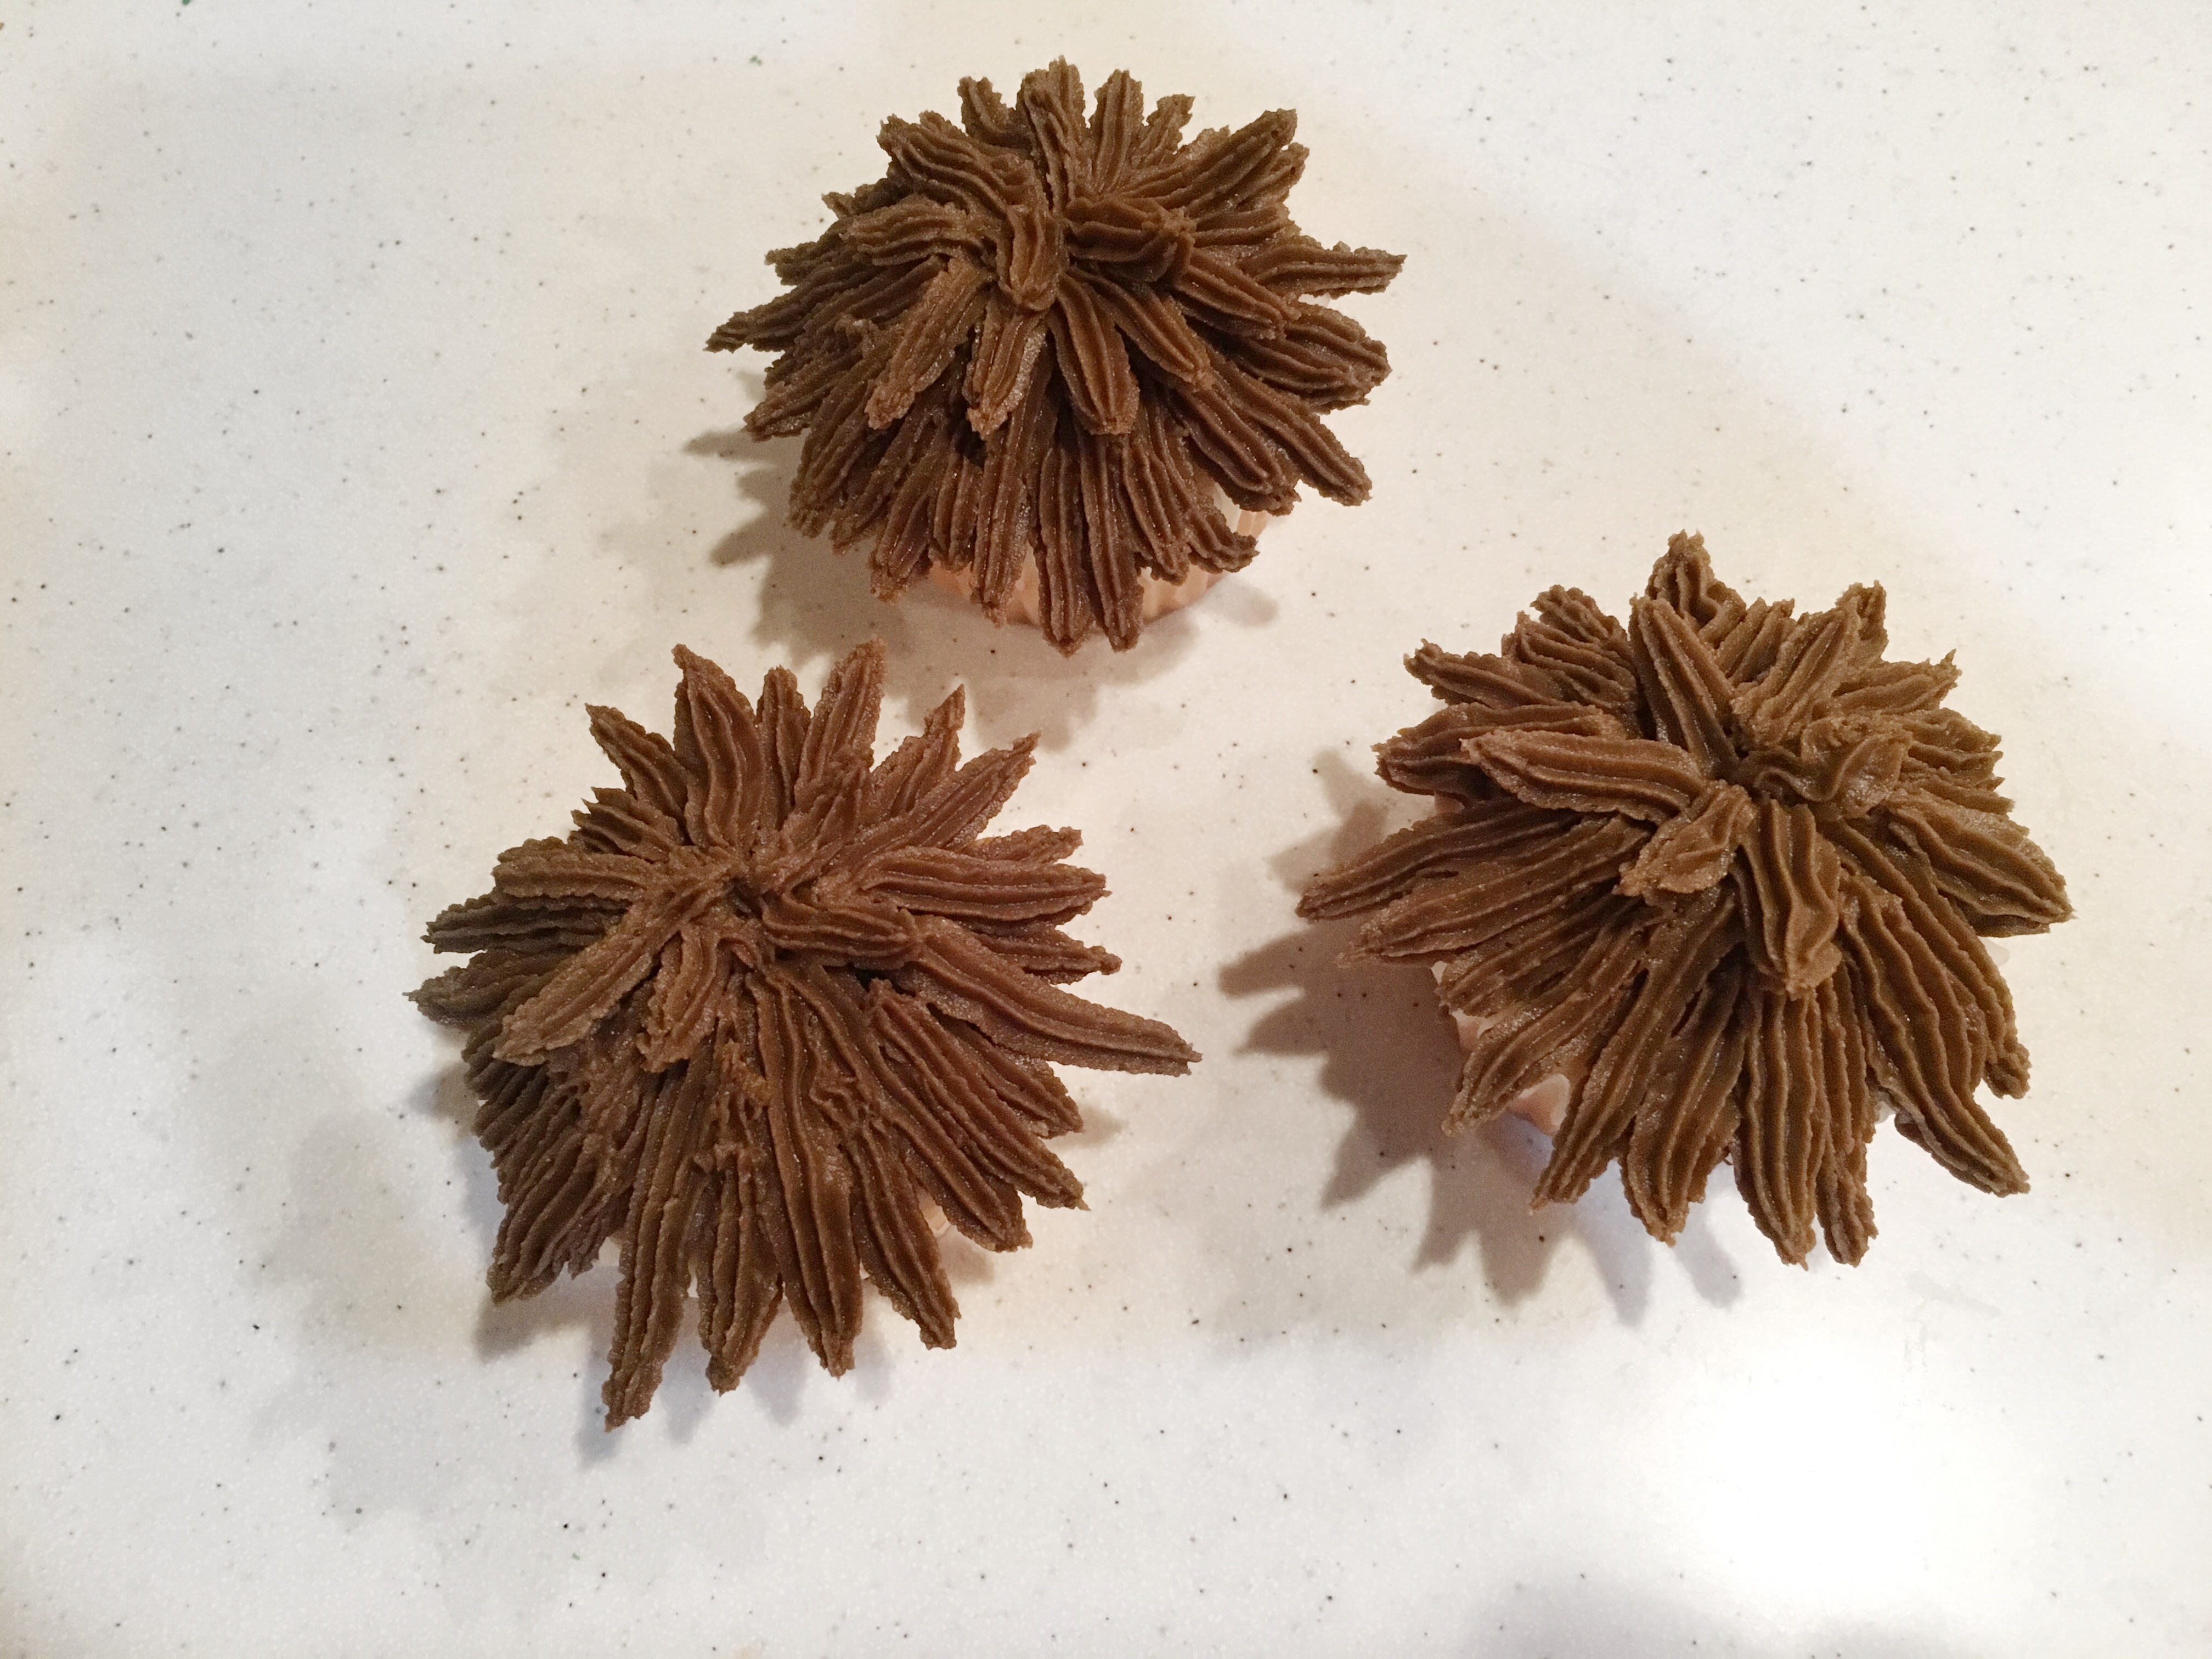
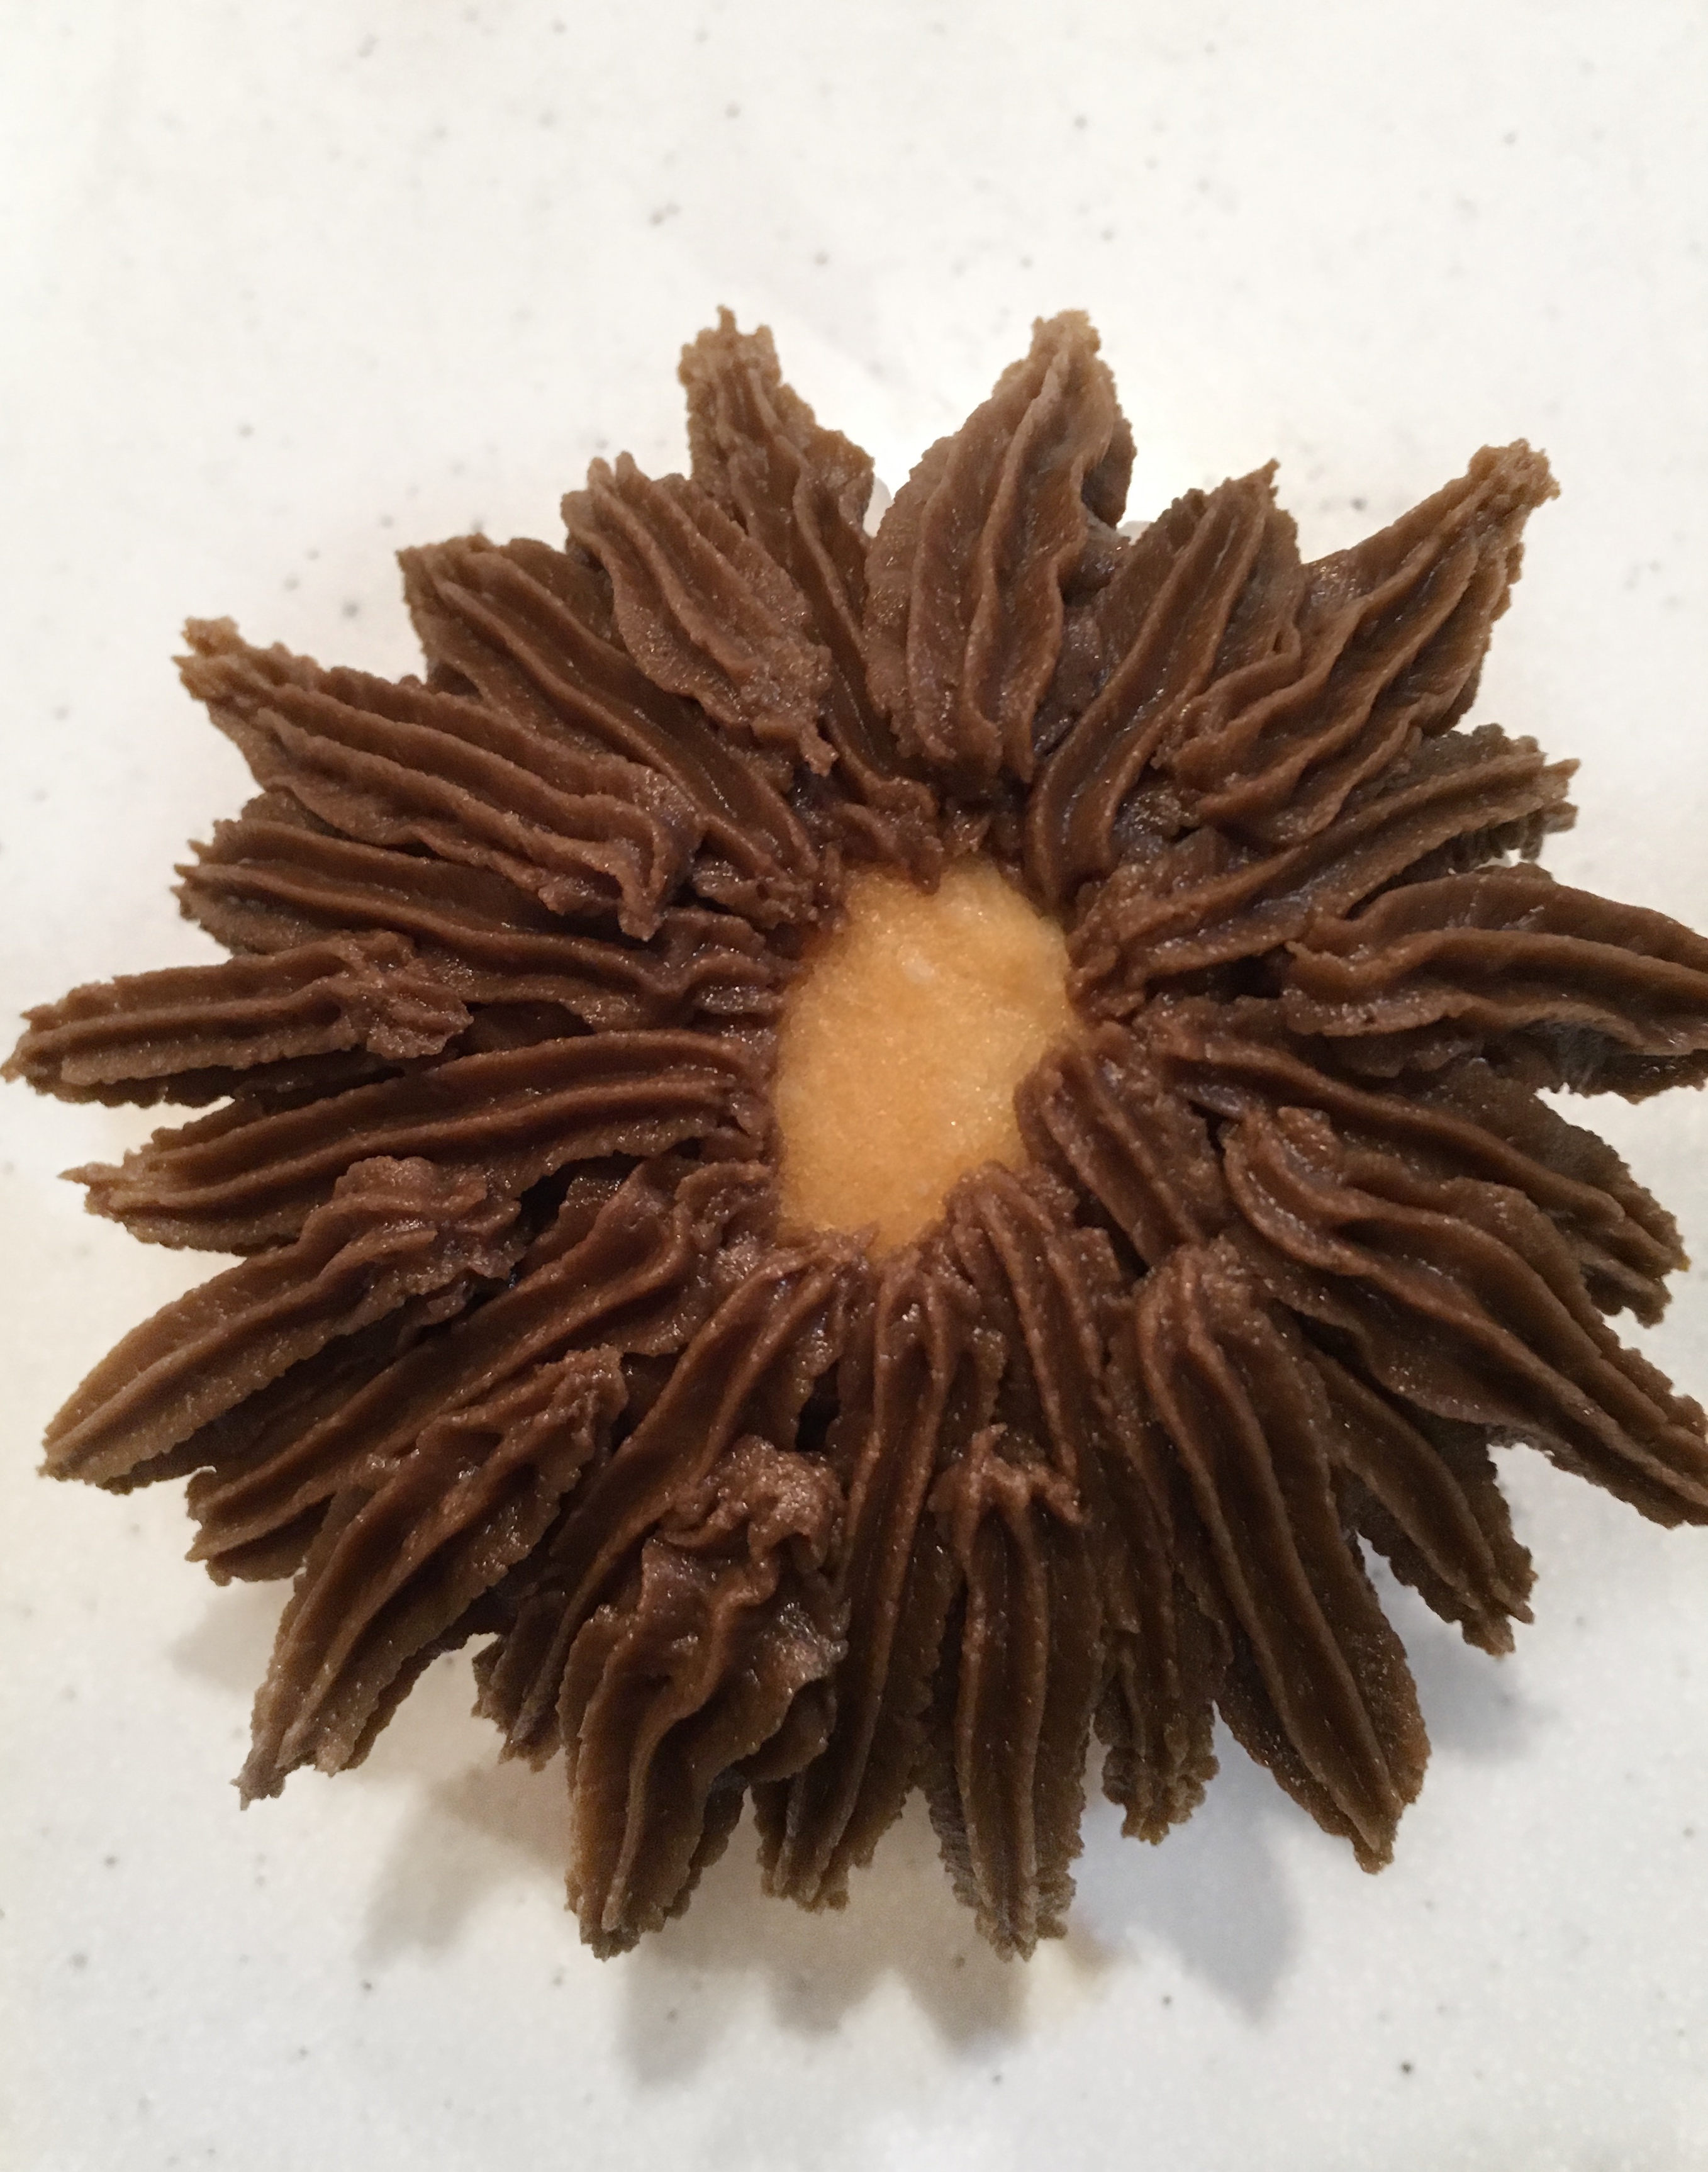
Continue using tip #18 and adding frosting strips to the werewolves around the off-center circle until the frosting completely covers the surface of the cupcake.
The final step is to add the face. For this you will use tip #3 and red icing to make a line for the mouth and tip #7 with white icing for the whites of the eyes and the fangs. The eyes are simply circles. The fangs begin as circles, then pull the icing toward the bottom of the cupcake as you ease the pressure on the bag. This will give the fangs the pointed shape.
Finally, using tip #3 with black icing to add a dot for the nose, dots in the eyes – either in the center of the eyes, or crossed, or off-set. The last feature is while still using tip #3 and black icing, add lines over the eyes for the eye brows.
Thanks for reading. I hope you enjoyed this tutorial on these spooky cupcakes. If you have any questions, I will be happy to try and answer them in the comments below, and don’t forget to subscribe to our newsletter!