Window Treatments and Wall Decor – Week 5 – ORC
Hi everyone, this week we finally made it to the window treatments and wall decor for our dining room makeover. If you are following along on our One Room Challenge adventure, welcome back. If this is your first time visiting we are so happy you are here and if you would like to catch up you can find everything from our plans of Week 1 to our accessories of Week 4 at the following links. Week 1. Week 2. Week 3. Week 4.

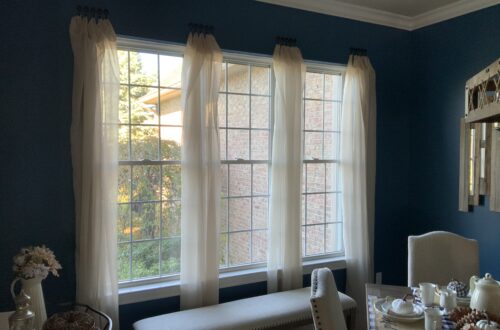
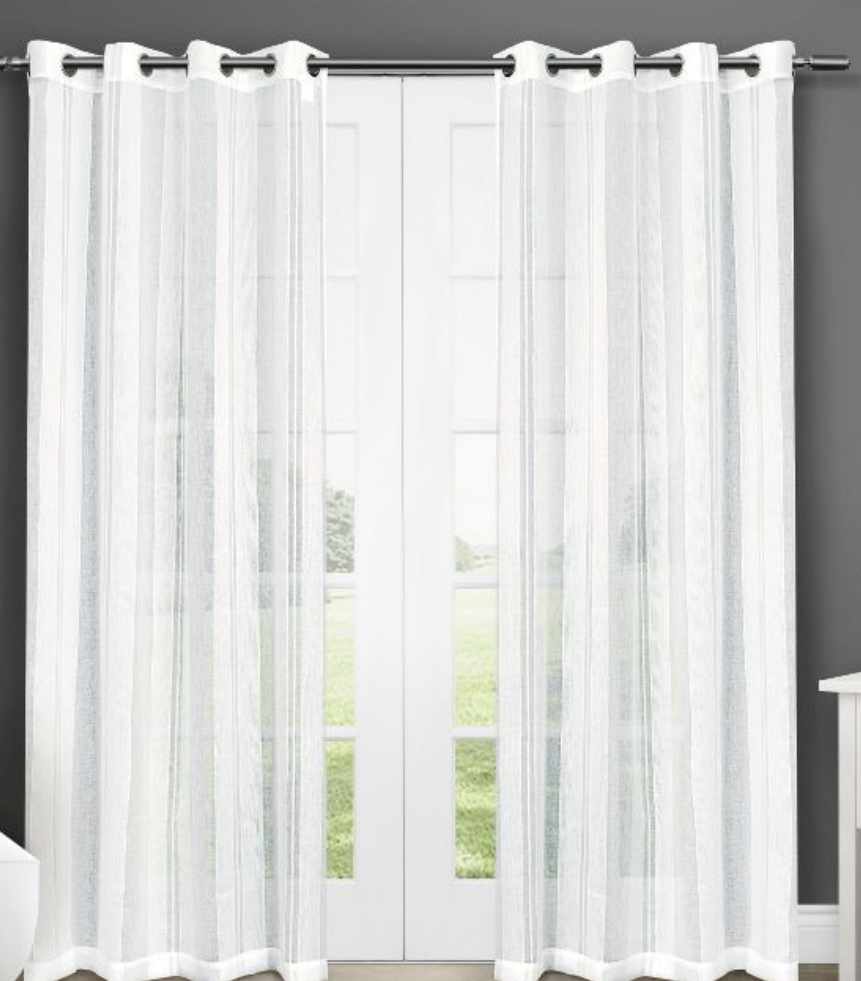
Let’s jump right in and get started with the window treatments. I knew I wanted sheers for this room to add some light texture to the room. What I didn’t know is how long it would take me to find what I wanted. First I tried these. I have these in an adjoining room and I love them there, but I wasn’t happy with the white color in the dining room.
Curtains
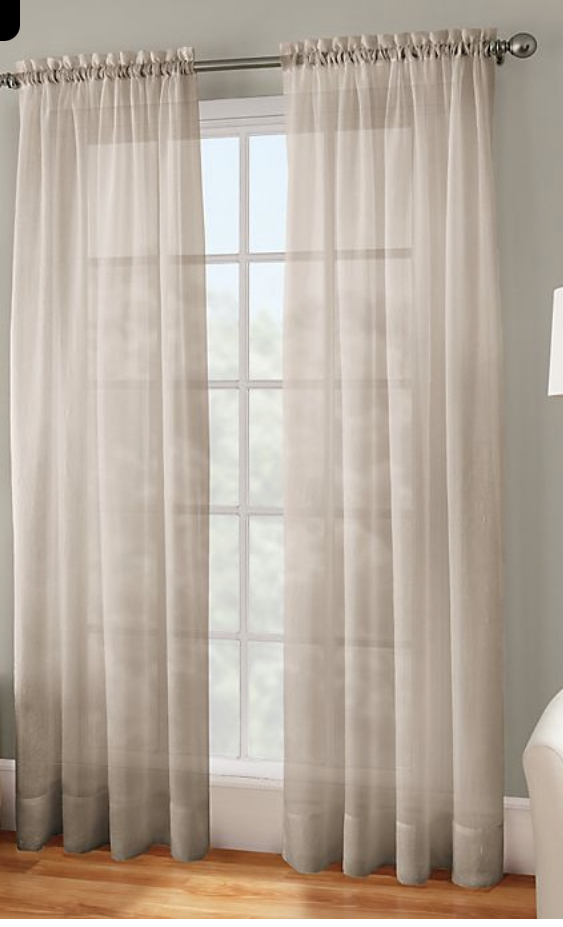
Next, I found these. In the photo, they are such a pretty color. I’m sure they are still a pretty color in person as well, but next to my dining room chairs, they were very yellow.

Finally I found these in Linen. The color looks a bit dark in the photo, but they are a perfect match for my chairs.
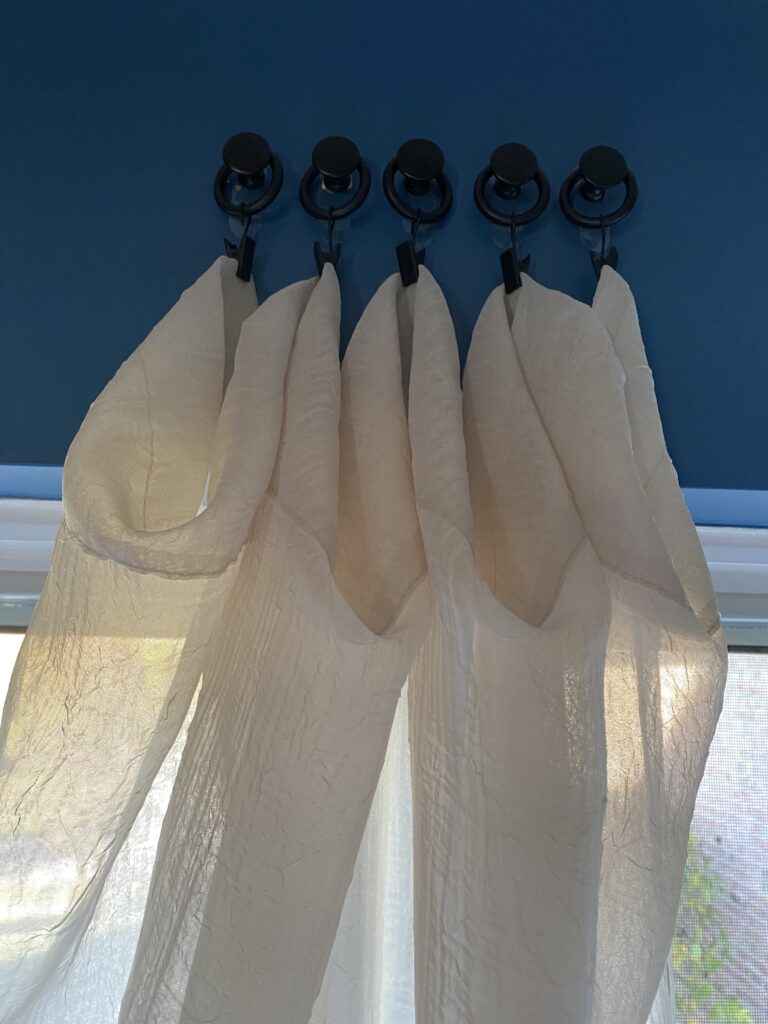
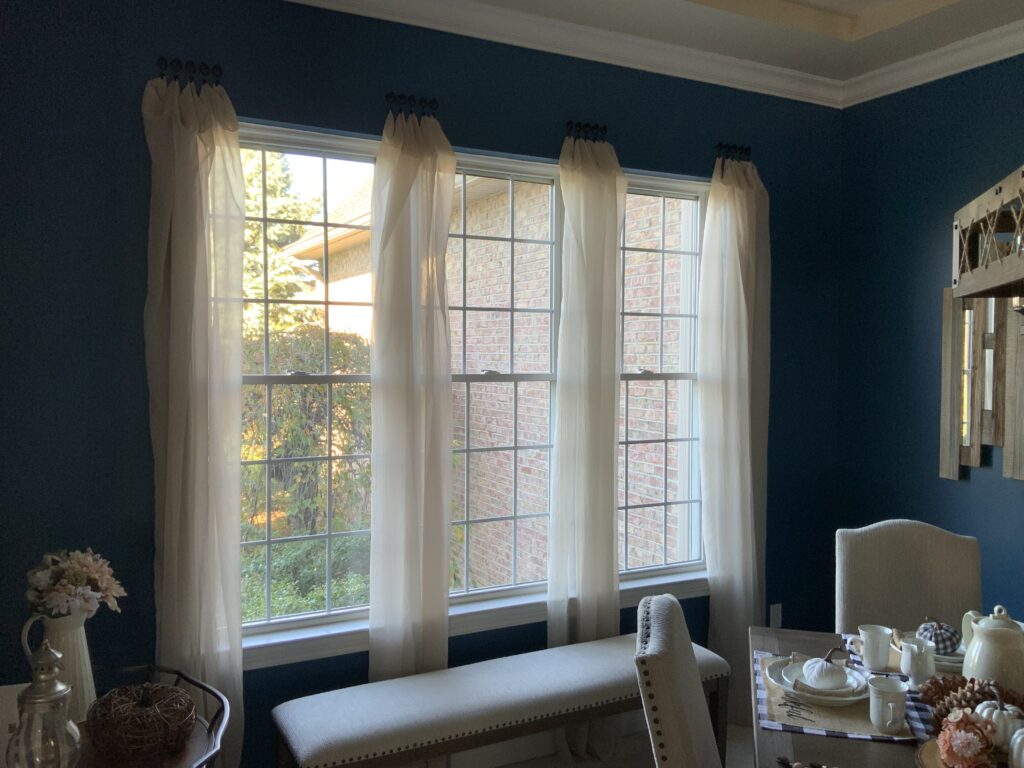
Now that I have the right curtains, I had to figure out how to hang them. The window in this room is very wide, and while I love a chunky wooden curtain rod, I think it would be too much for sheers. I also didn’t want a thin rod stretching all the way across this window. So I searched Pinterest and found an idea where you attach drawer pulls/cabinet knobs to the wall and use ring clips to hang the curtain from those.
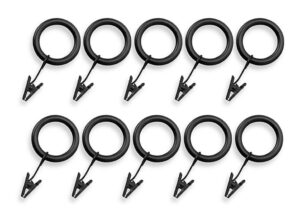
I used these pulls and ring clips. When selecting pulls and rings make sure that the ring will fit over front of the drawer pull. Remember the back of the pull will be attached to the wall.

I attached the drawer knobs to the wall with command adhesive strips by 3M. Soon I will post the complete how-to and I will add a link here. However, I will add if the curtains are any heavier than sheers or you just want a more sturdy way to hang the curtains you should use double threaded anchor bolts and drywall anchors. At some point I may attach my cabinet knobs with anchor bolts, but the Command Strips are holding more then enough for the weight of my curtains. To determine the size anchor bolt needed you should measure the size of the screw included with your cabinet knobs/drawer pulls. Double sided anchor bolts look like this:
I had so much fun doing the curtains.

Before we move on to the wall decor, I have one quick tip for getting out the creases. The curtains I ended up with are crushed viole so I couldn’t just iron them. I discovered that a great way to get the creases out of curtains is to put them into the dryer on low with a damp, white towel and a couple wool dryer balls. Leave the curtains in the dryer until the towel is mostly dry. I only did two panels at once because I wanted them to have lots of space. Also, when the dryer finished, I turned it back on with the remaining panel while I hung one panel. The wool dryer balls I used can be found here.
Wall Decor
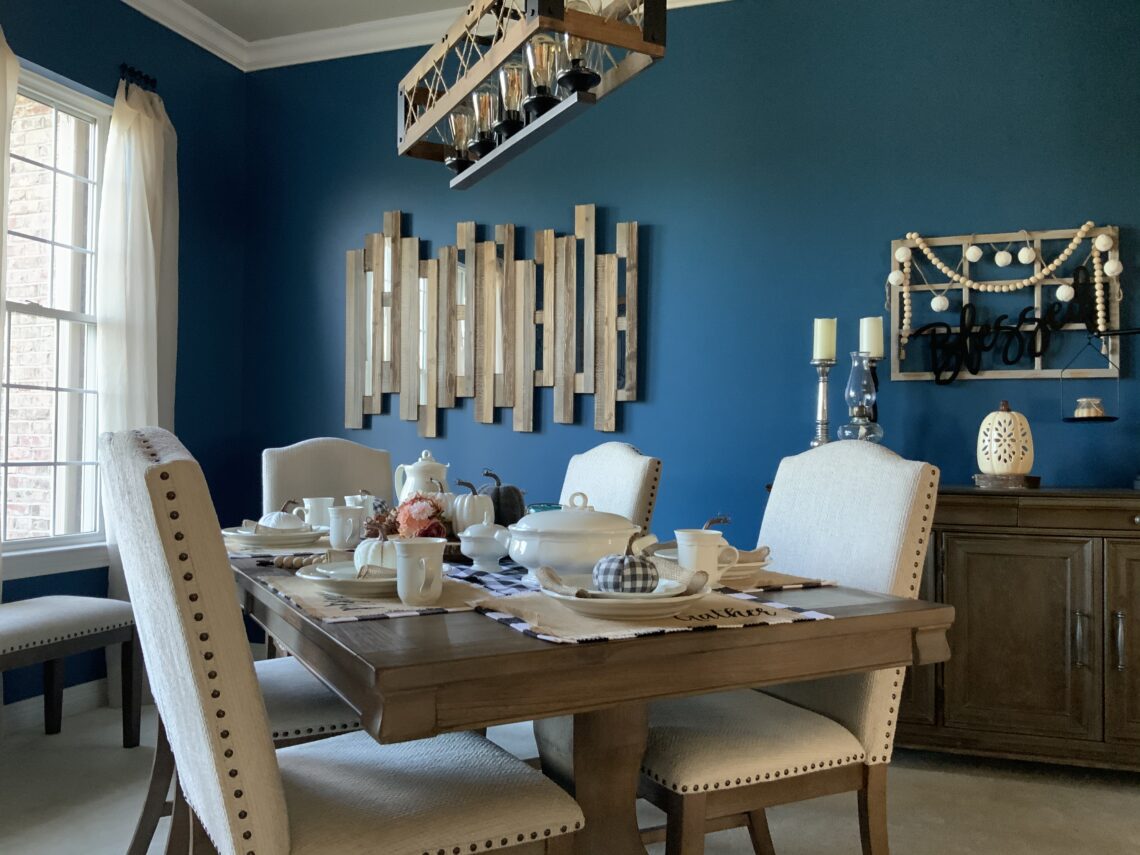
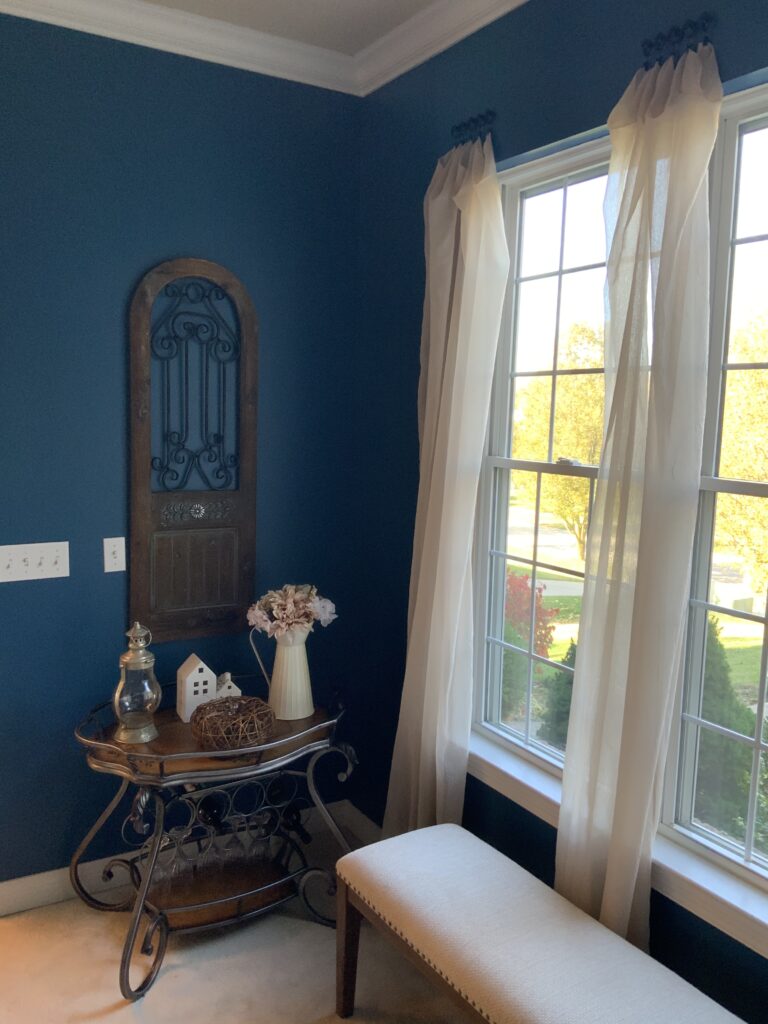
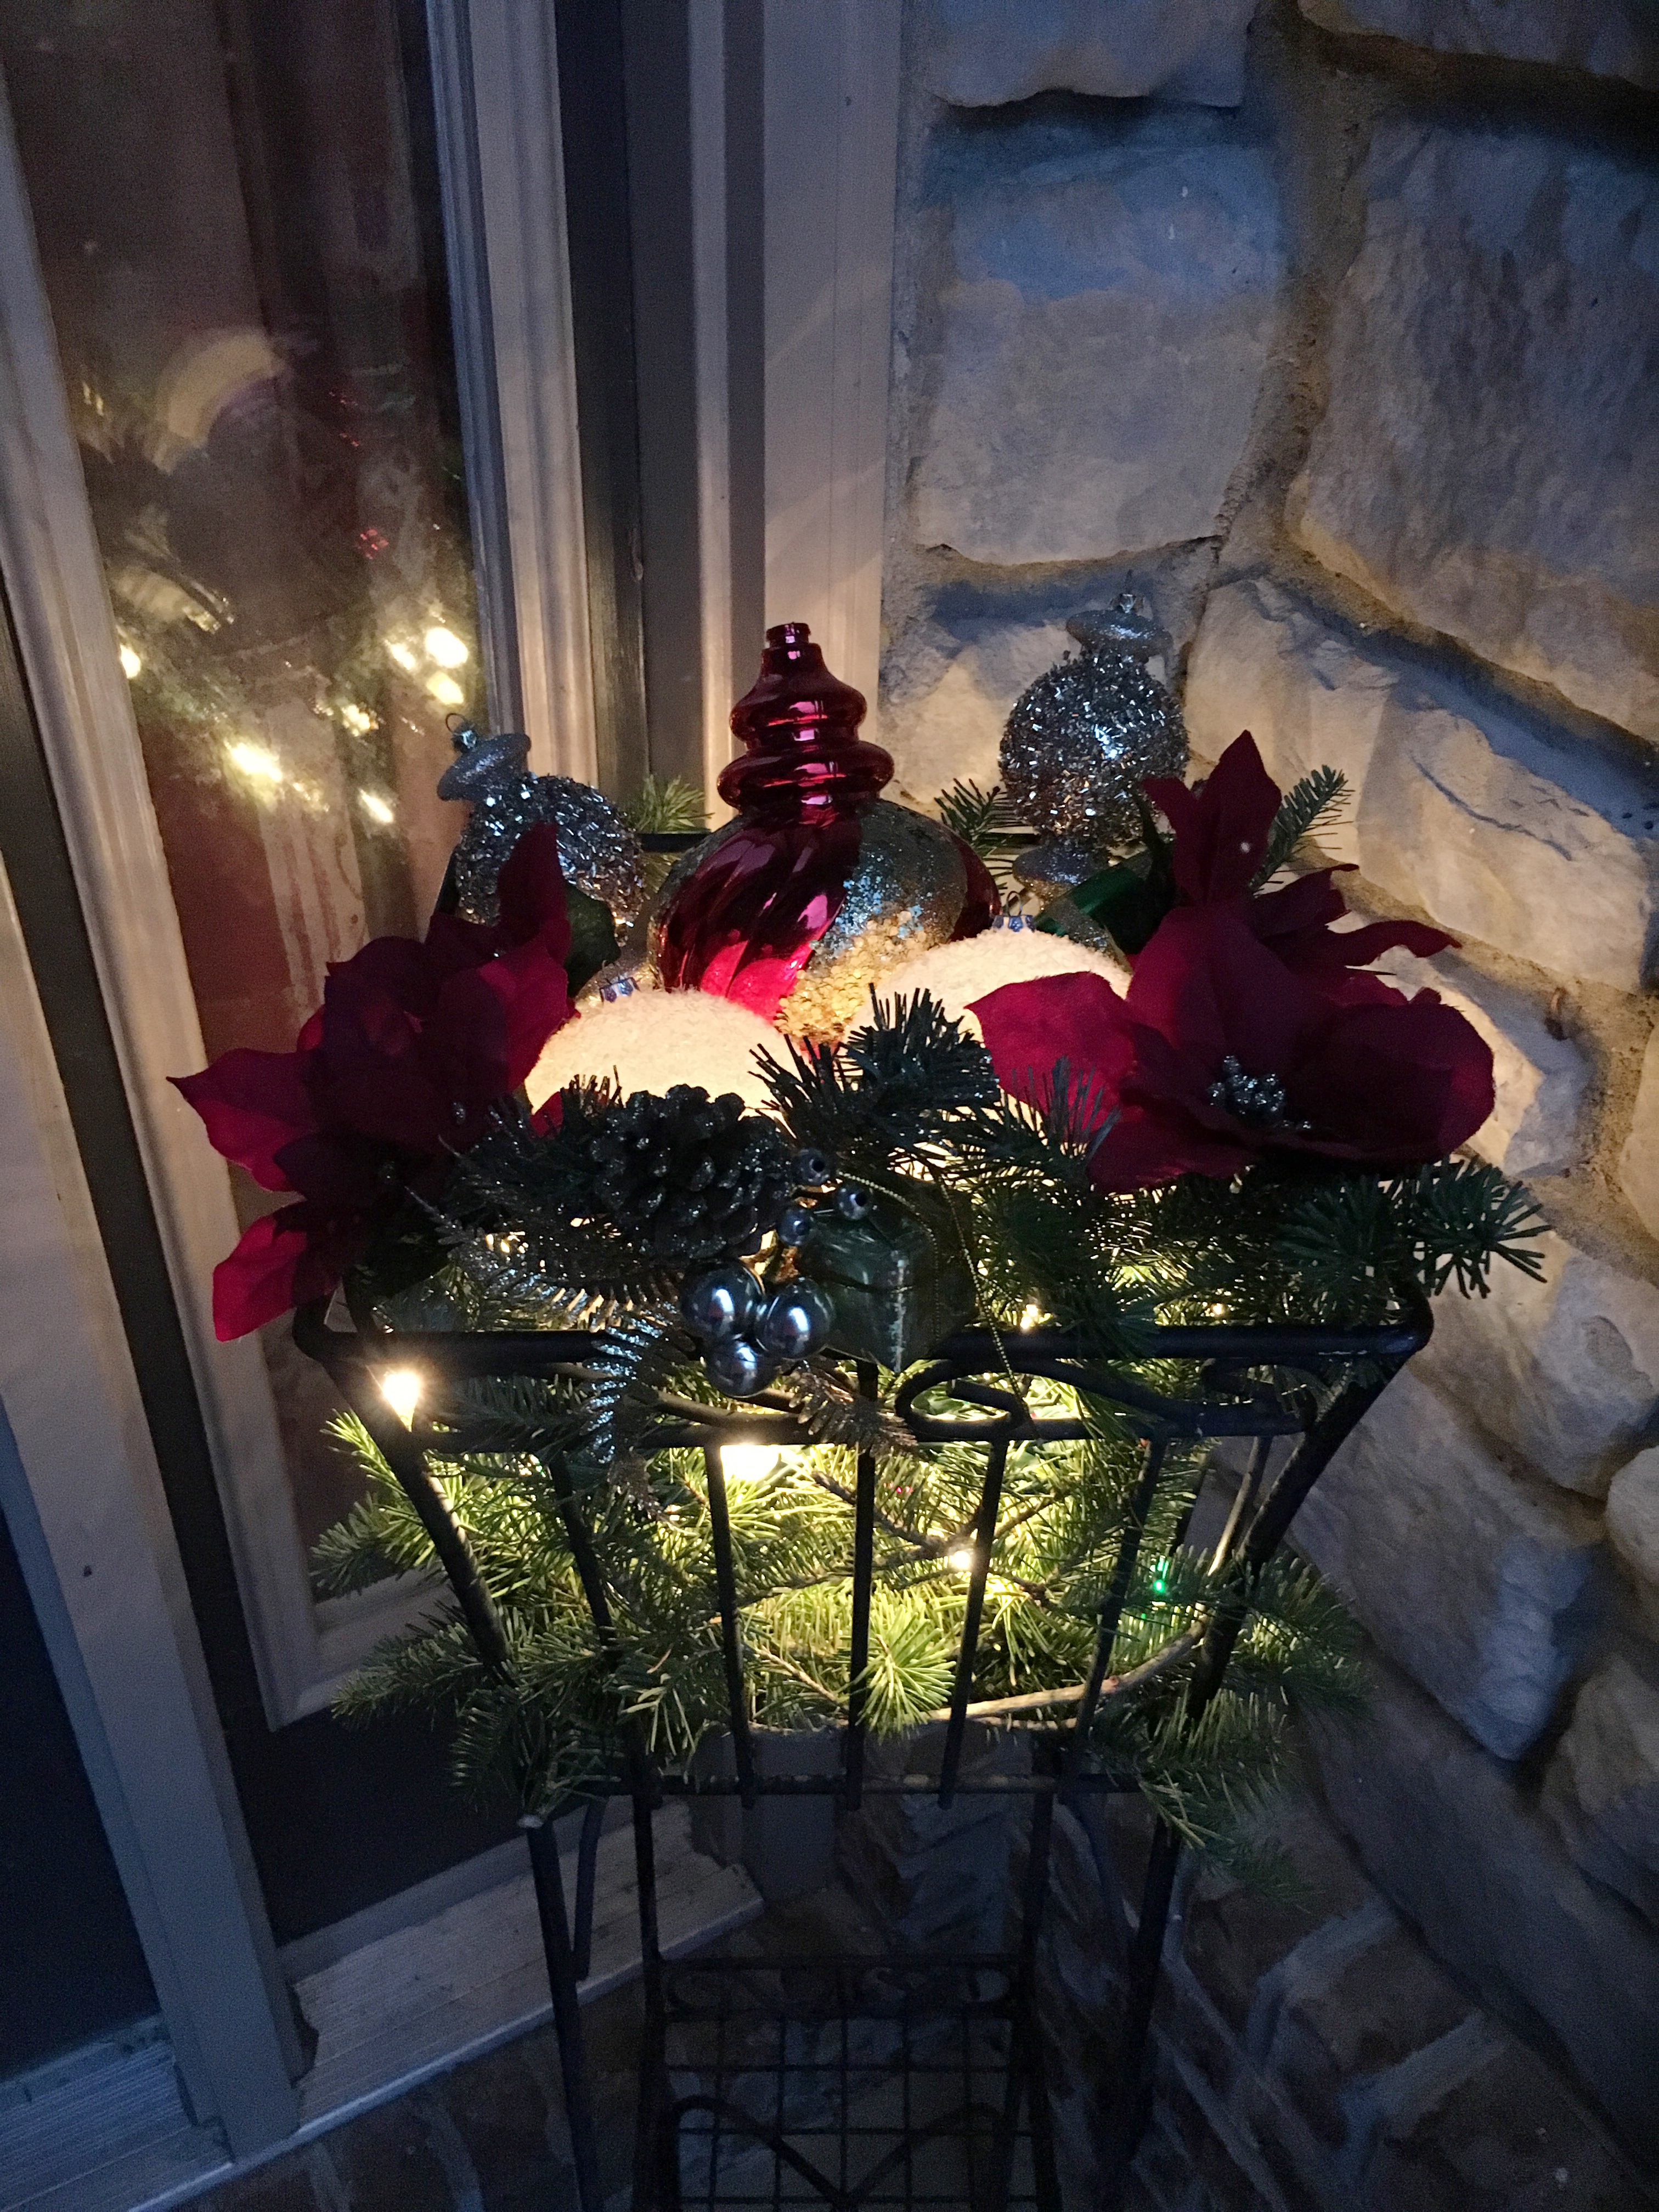
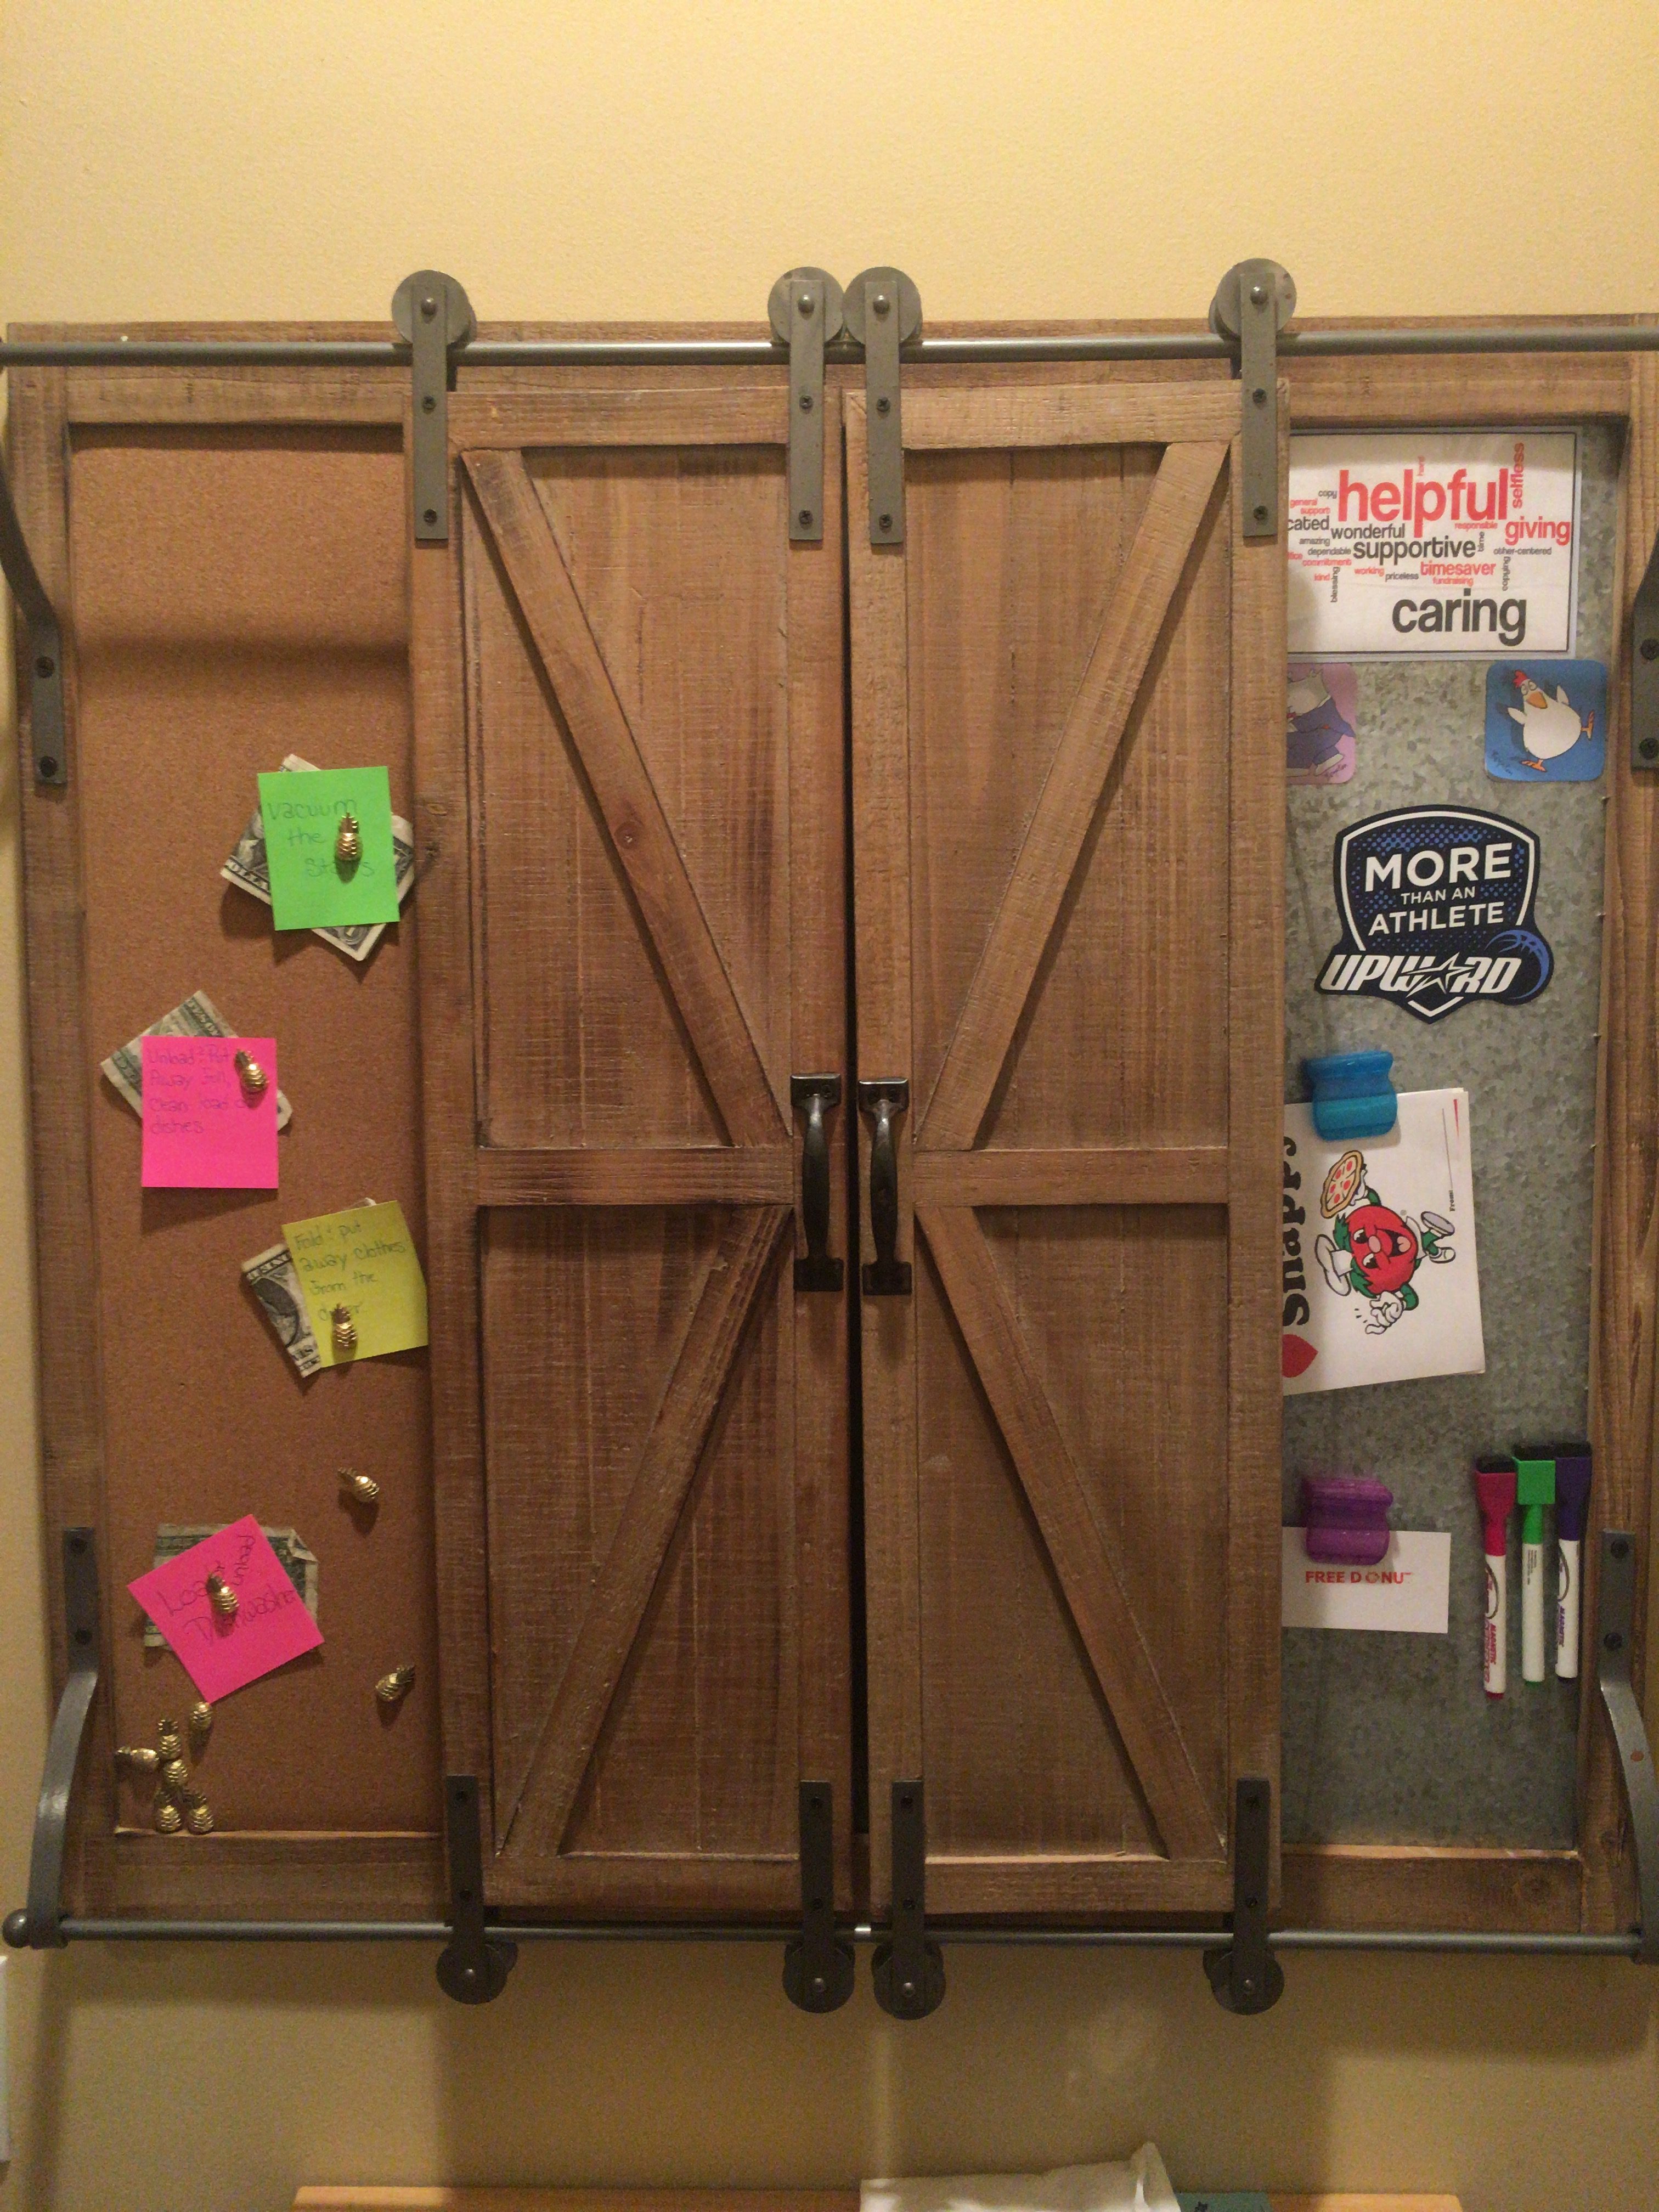
Our dining room is so open there are very few walls to decorate, but I do have a small wall above the wine cart. The ceiling is about 10’ in this room and this wall is only about 6’ wide, with several light switches to accommodate, so I needed a tall thin piece of decor. I had this one outside on my covered porch and I thought it would work perfectly in the space.
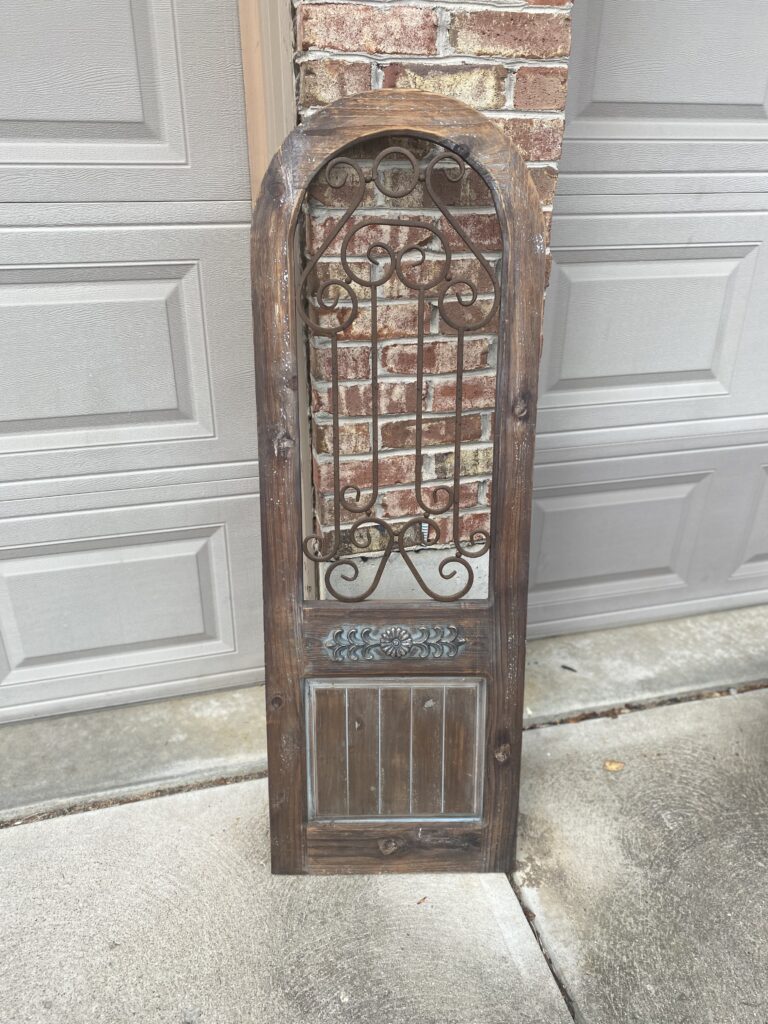
I made one little change to this piece because I thought the rust color would add too many metal colors to the room. The light fixture has a black finish, the wine rack is a pewter finish, and adding a rust finish to the mix might have made it too busy. I removed the metal grate and painted it black.
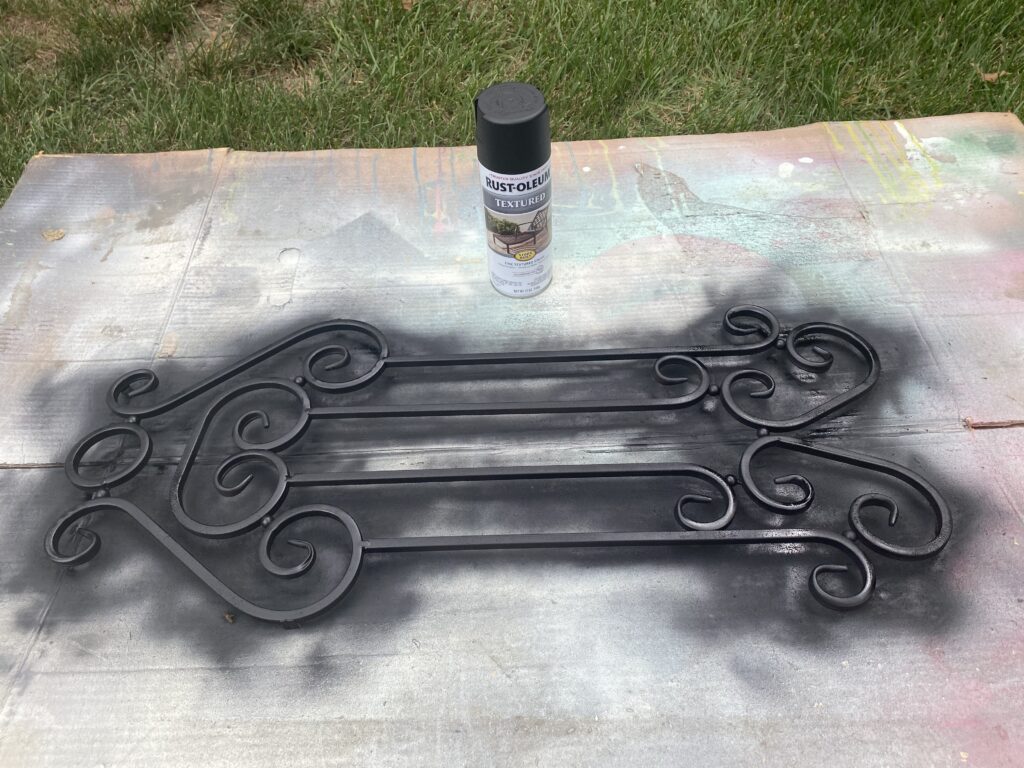
I did love the rustic look of this piece so to keep it looking as rustic as before, I used some fine grit sand paper on some of the edges. Here is the finished product.
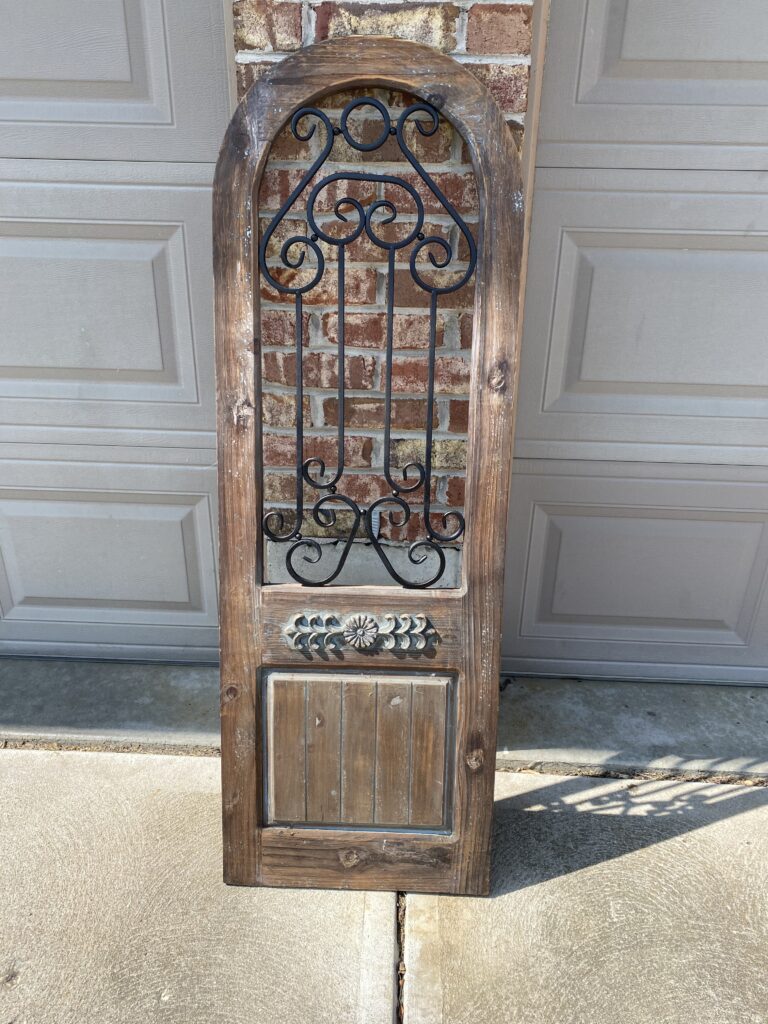
After touching up the edges I was able to hang this in our new room.
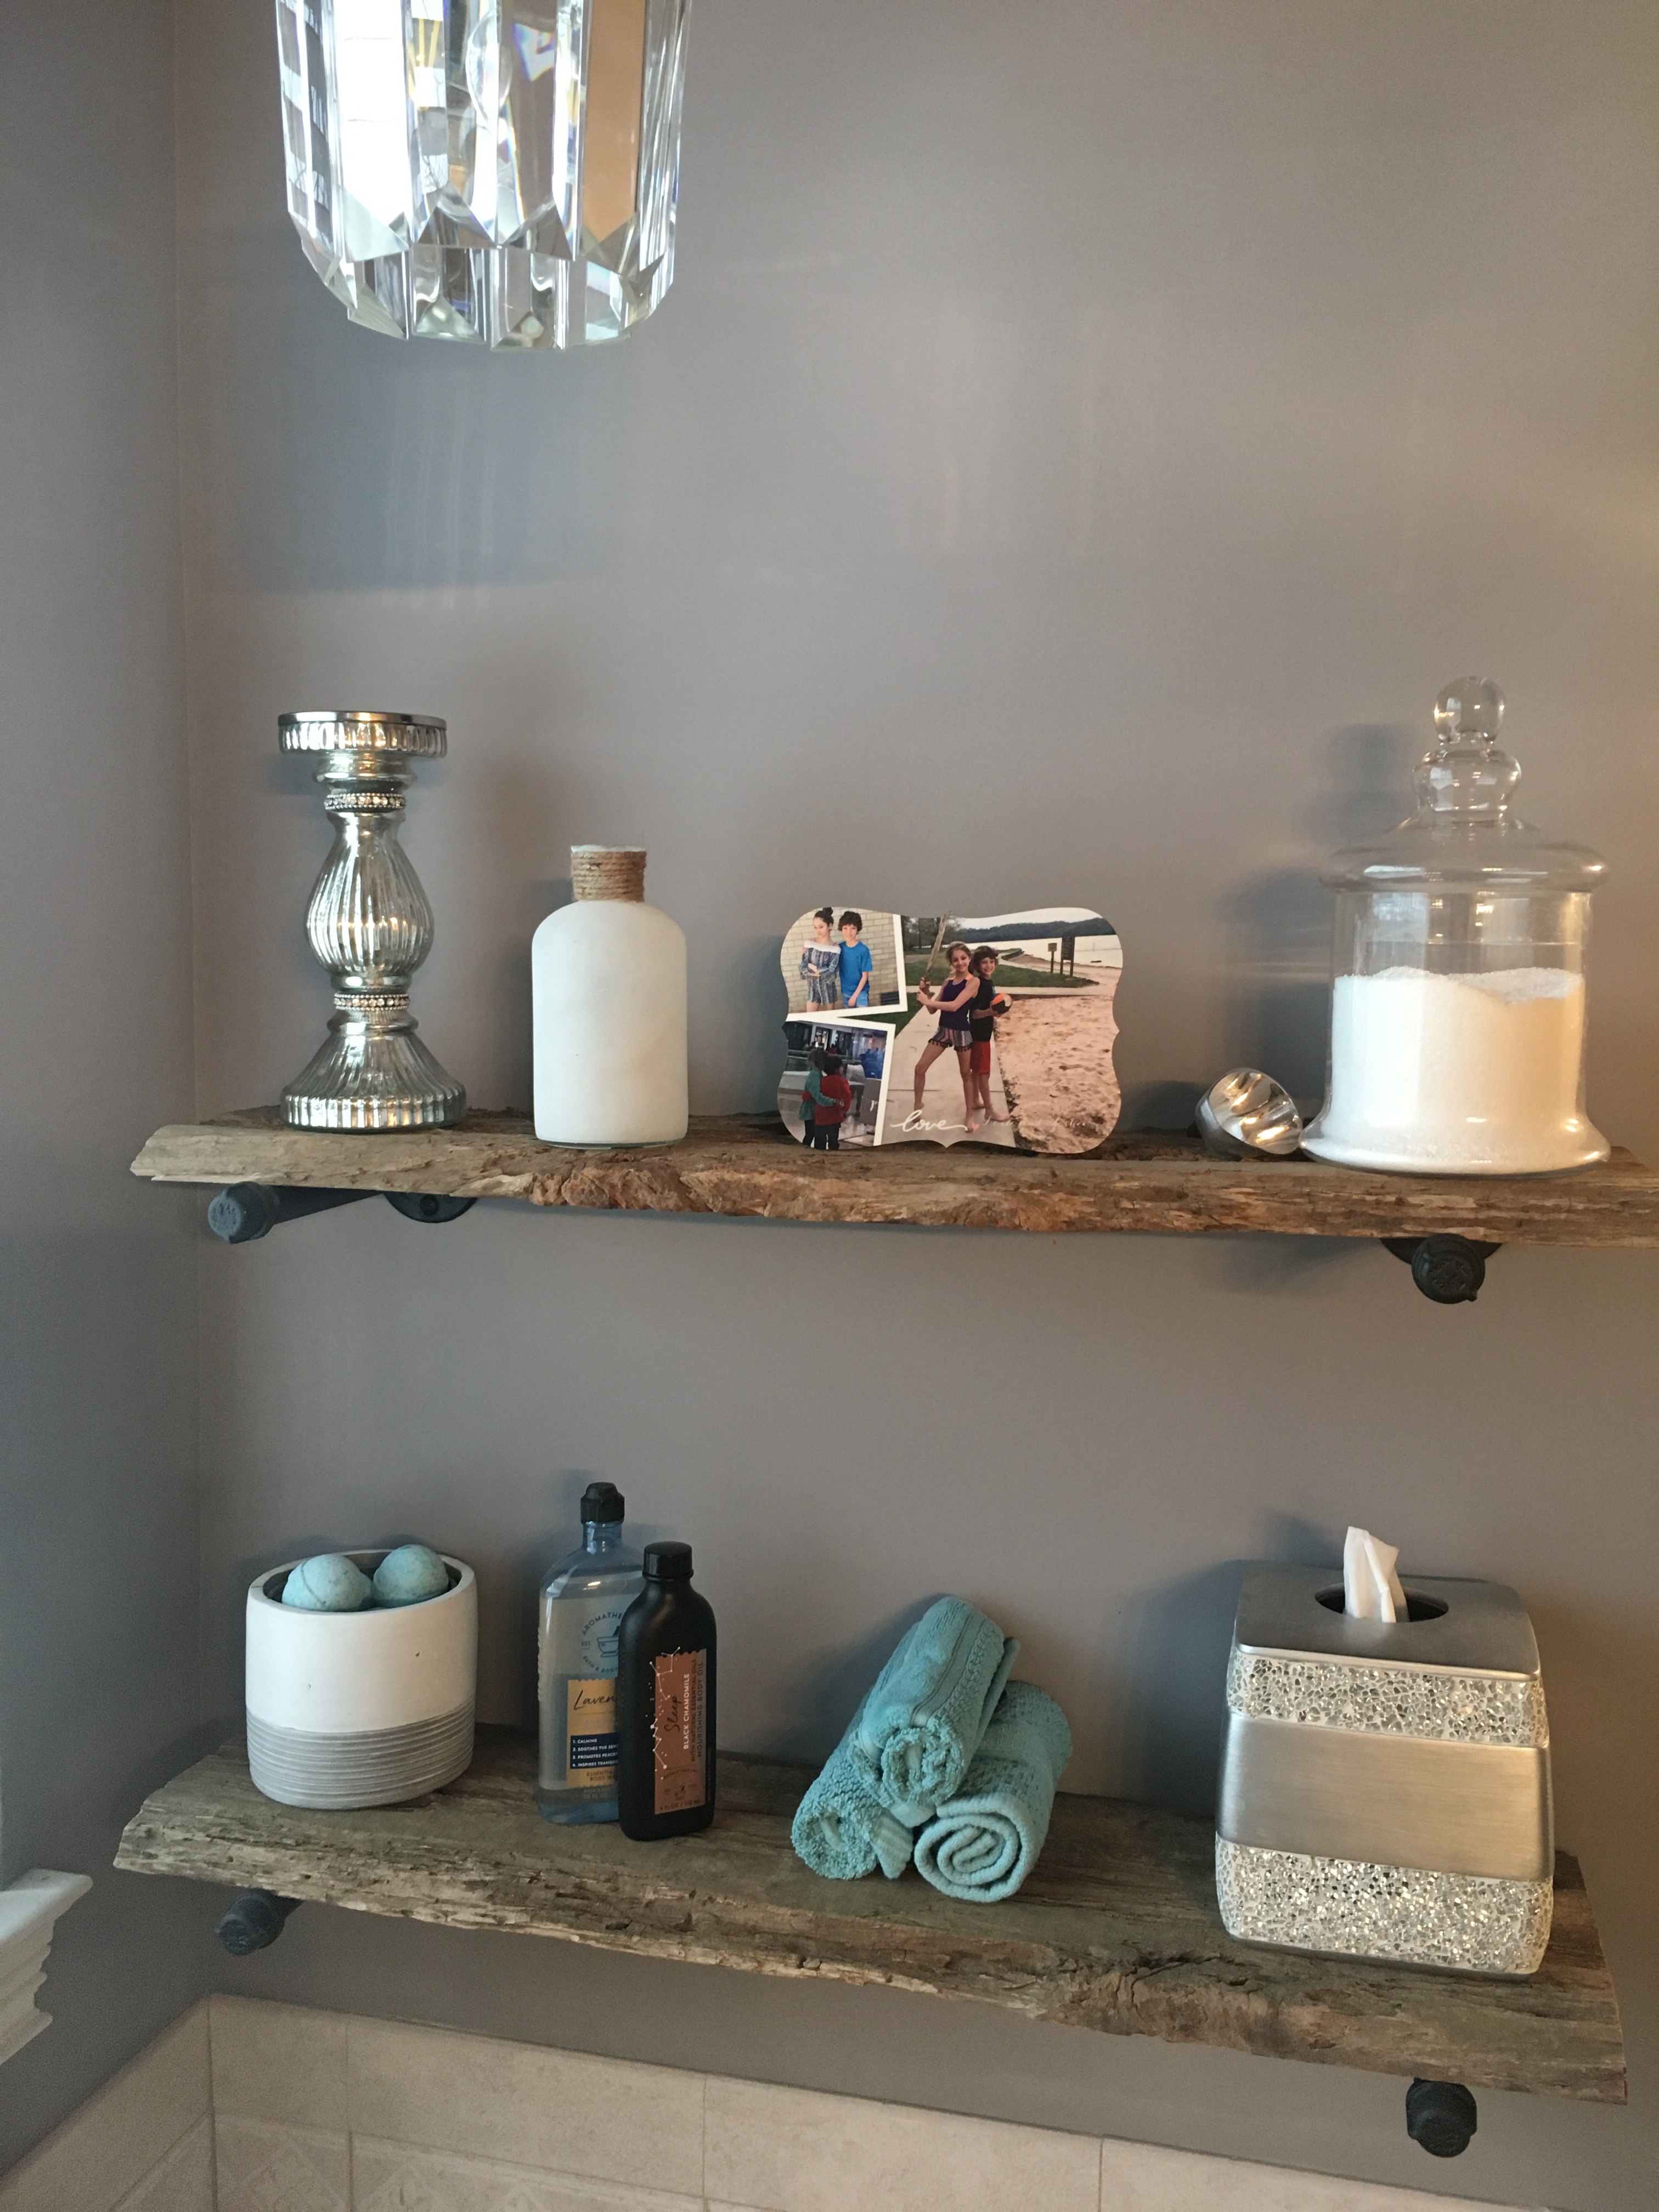
Across from the wine rack is the only other empty wall in the room. I showed last week a wall decor piece that I made, you can find that post here. This piece is above the server, which leaves the rest of the wall blank. Again, I went through several options before I found this one.

It is a very heavy piece and my only suggestion for this one is to make sure your wall anchors work before inserting them into the wall. One of ours wouldn’t expand and my husband pressed so hard trying to get the wall anchor to deploy that he shoved it all the way through the wall. We heard it land in the basement!

Thanks for stopping by. I would love to hear from you. Next week we will see some before and after photos, and hear about a couple of things I would change if I were to do it again.
Don’t forget to check out the other designers. Links to all for the projects can be found here.
Have a great week. See you next time!
Sondra
You May Also Like
Jobs-For-Hire Board
Rustic Wooden Shelves Made from Upcycled Wood